
Posts from — October 2013
Happy Halloween

October 31, 2013 1 Comment
get cooking!
I have not cooked in days … for more than a week actually!
Between the craft class, eating out, friends’ parties, cooking classes, ordering in and my birthday – I just haven’t had time.
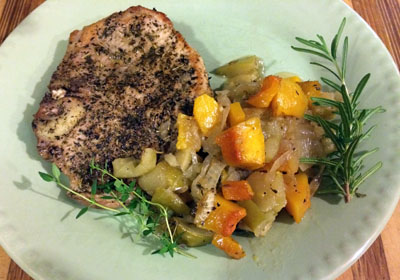
What could be better to get back into the swing than the combination of pork chops, maple syrup, squash and apples?
Note: You may notice that I only cooked 2 pork chops, but the recipe really and truly is for four chops.
October 30, 2013 1 Comment
the rest of the crafts
This is the final post for the 2013 Fall Craft Party. A wrap-up, of sorts.
(*For links to all the craft projects please scroll to the bottom of the page)
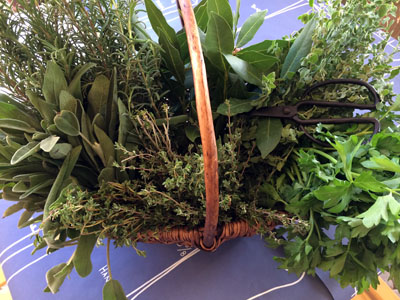
The basket of fresh herbs was used to make bouquet garni.
Bouquet Garni is a bundle of herbs, tied together with string, and then used to prepare soup, stock, stews, and such.
The bouquet is cooked along with the other ingredients of a dish but is removed prior to serving.

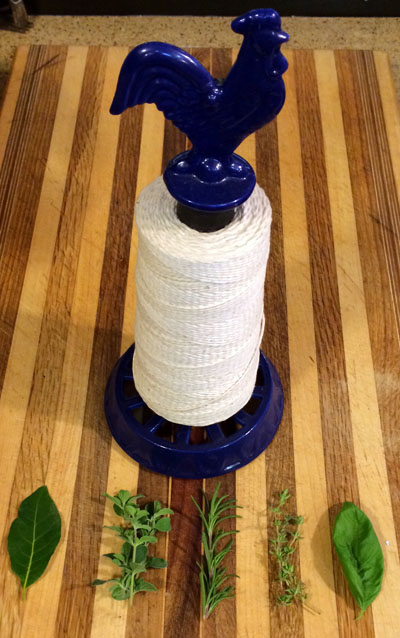
We used bay leaves, oregano, rosemary, thyme, and basil for our bouquets.
Here’s how to make BOUQUET GARNI:
1. Gather the fresh herbs you wish to bundle –make sure they are fresh, not dried. Also, be sure that you have allowed them to completely dry after washing them. Do not bundle moist herbs—they will turn to mush or worse yet, mold!
2. Take a few stalks of each herb you wish to include in the bundle and only one bay leaf for each bundle.
3. After gathering them together–use kitchen twine to wrap around {crisscrossing} and then tie in a knot at the end.
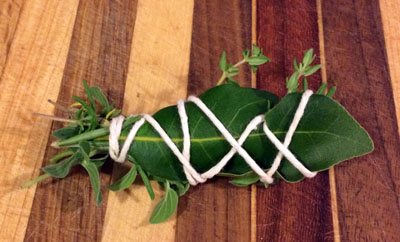
4. Allow your cute little bundles to sit out for a few days to dry—and then store in an airtight container until ready to gift as gifts or use for soups, stews, stocks, etc.
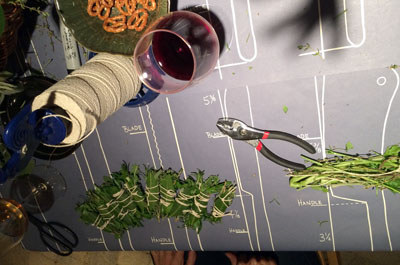
Kim was the most prolific bouquet garni maker – I think she may have gone home with a dozen. (I do not know why there is a pair of pliers in this photo -weird – you do not need pliers to make bouquet garni.)
It was requested by about half of the attendees that we once again make the burlap and fabric pumpkins. I happily obliged. Detailed instructions may be found HERE.
This table was one of the busiest places, all night long.
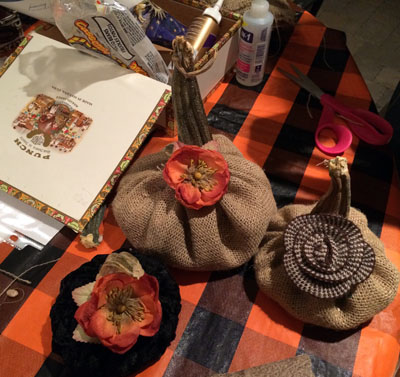
Dozens of beautiful pumpkins were created…
October 29, 2013 3 Comments
my fave
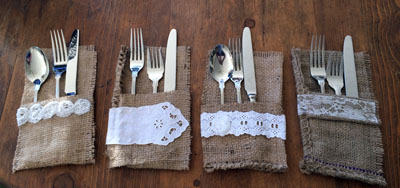
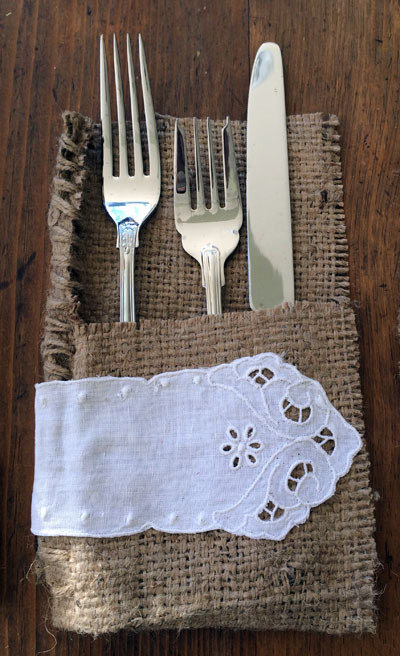
This, the fifth craft, from 2013 Fall Craft Party is my favorite. I can’t wait to use these at our Thanksgiving and Christmas tables.
(*For links to all the craft projects please scroll to the bottom of the page)
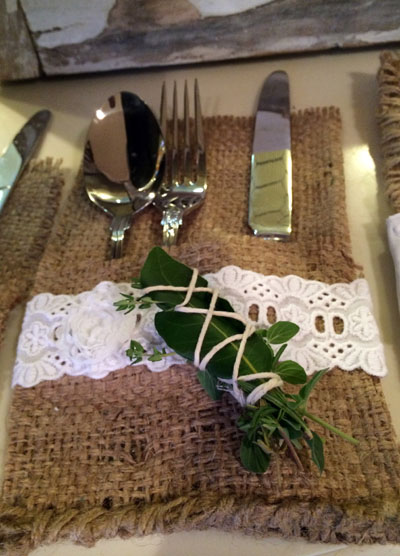
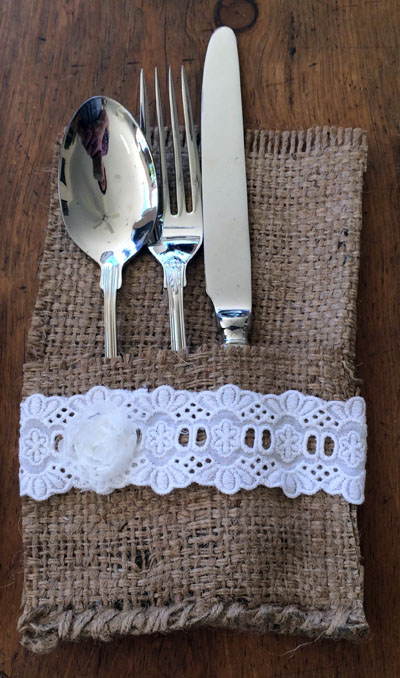
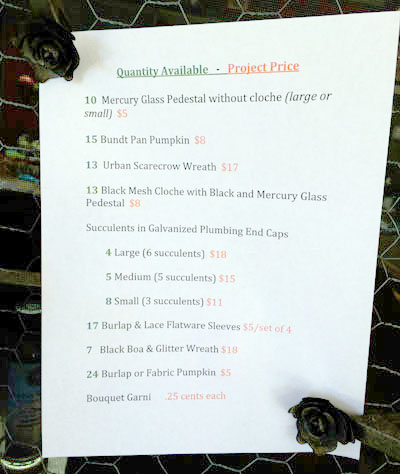
For $5, the crafters could make a set of four of these fantastic burlap and lace flatware sleeves. Flatware not included.
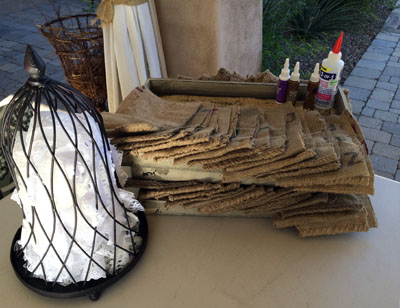
I once again received the burlap coffee bean bags free from my dear friend, Tram Mai, and her husband, Stephen. The bags came from their Press Coffee Roasters.
I am not a coffee drinker, but if you are, you should go to Press! I am told their coffee is the best, so good in fact that the Four Seasons Resort Scottsdale at Troon North buys their beans from Press. Now that’s a rave endorsement if ever there was one!
The cost of the craft covered my cost for the lace and the bottle of Tacky Glue. Lace ribbon is so expensive – I had no idea.
I think the set with a mix of burlaps and a mix of laces is the best.
Here is the “almost too easy to have to explain” no-sew instructions:
October 28, 2013 2 Comments
it’s a Birthday Pity Party
Today is my birthday!
Yahoo! I really truly totally and completely love my birthday.
There are so many silly people (my husband included) who sigh, moan, and groan about their birthday. “Woe is me, yet another year older.”
Wake up people, the alternative is not so happy!
You may be wondering then, “If she loves her flipping birthday so dang much, what’s up with the ‘birthday pity party” title?”
Oh, that has nothing to do with it being my birthday.
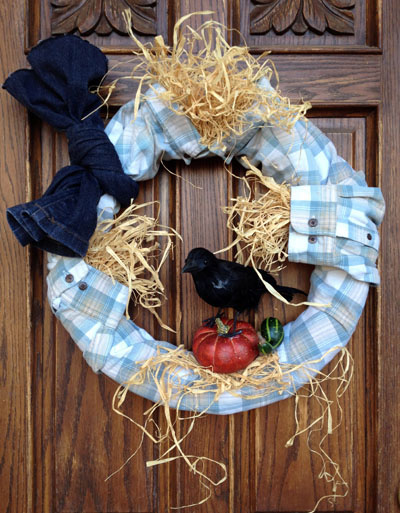
The Pity Party is in reference to today’s featured craft from the 2013 Fall Craft Party.
See that photo above? How darn cute is that?!? It’s an Urban Scarecrow Wreath. You know, urban, ’cause there’s not a real need for scarecrows in suburban Scottsdale.
No corn that we need to scare crows away from.
To be honest, there aren’t even that many crows here in suburbia.
We have plenty of pigeons though, so if somebody invents a working scarepigeon – I’m in! Until then, I’ll continue to research ways of taking the matter into my own hands. I quite like using my pellet gun to control the pigeon population in my yard!

Anyhow…. one of the nine crafts the guests might have chosen to make was an Urban Scarecrow Wreath.
There were 23 crafters and 13 wreaths available. Guess how many wreaths were made. Come on, shout out your best guess…
No, not thirteen.
Not nine.
Not even five.
…………..
…………..
…………..
None! That’s how many!
Not one wreath was made.
Sigh. Moan. Groan.
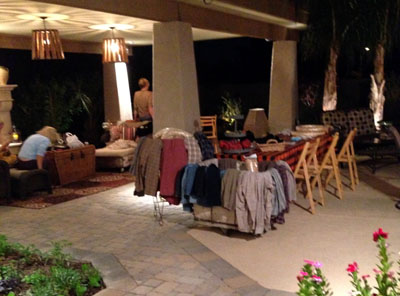
This photo was taken late in the evening. You can see ladies in the background, happily working on their Boa & Glitter Wreaths and Bundt Pan Pumpkins. Yet, there in the foreground we see the sad, empty, and ignored scarecrow wreath station.
Bitter?
No, I’m not BITTER! I’m fine with it.
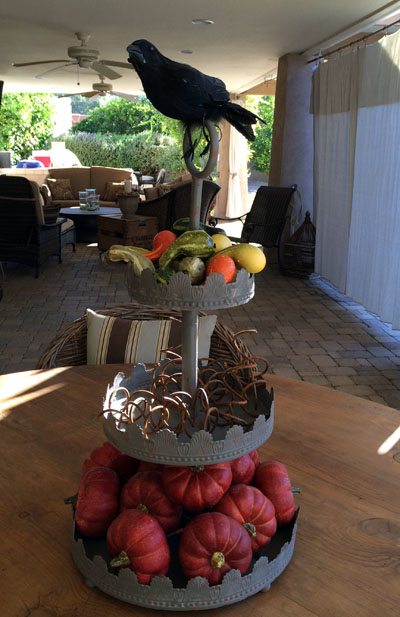
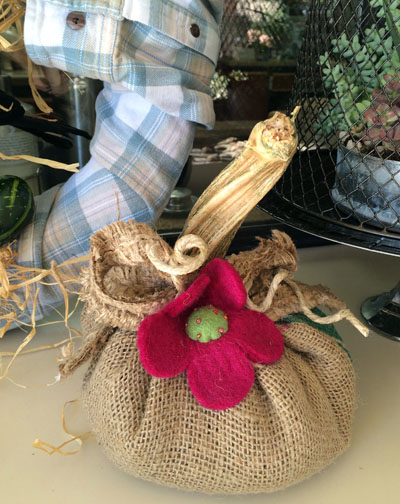
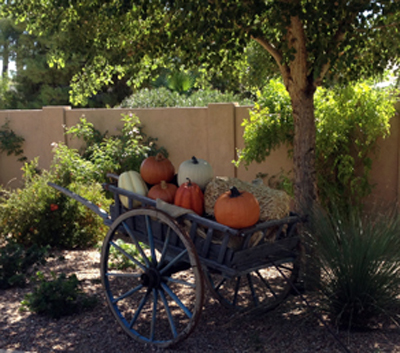
Look, at what I’ve done with all the fake pumpkins, gourds, some of my rusty springs, and one of the crows… I’ve made a really cute centerpiece for one of the patio tables.
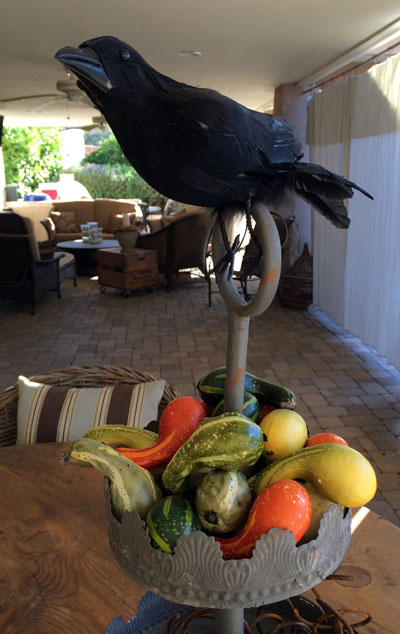
The crow stands guard, watching for any returning crafters who regret NOT making the cutest fall wreath ever.
Don’t try coming back.
It’s too late!
The 13 crows and me – yeah, we’ve moved on!
(*For links to all the craft projects please scroll to the bottom)
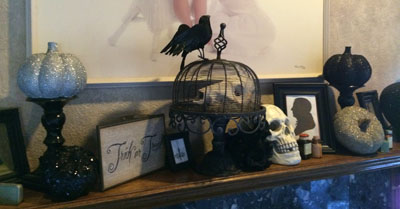
His other crow friends are now part of the Halloween decor throughout the house, including this disappointed happy little guy on the living room mantel.

The 13 wreaths are neatly and happily stacked in the dining room, awaiting their next potential project – most likely some sort of Christmas wreath craft that anyone with good taste will be fighting over – just for the chance to make.
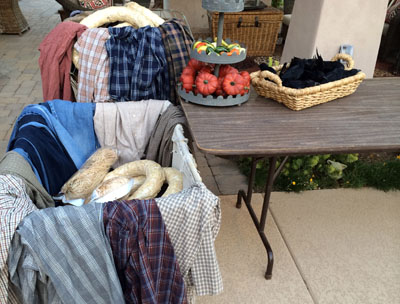
The people at Goodwill will be happy to resell all the shirts I bought, that have now been re-donated.
All is well, don’t worry about me. I’m just fine. It’s my birthday, for goodness sake, I am happy, happy, happy!
October 27, 2013 11 Comments
next up…
Craft #3 from the 2013 Fall Craft Party was tied for most popular. That could be attributed to the fact that it wasn’t a craft at all. More like gardening and playing in the dirt.
Or it may have to do something with the current trend of everyone loving succulents.
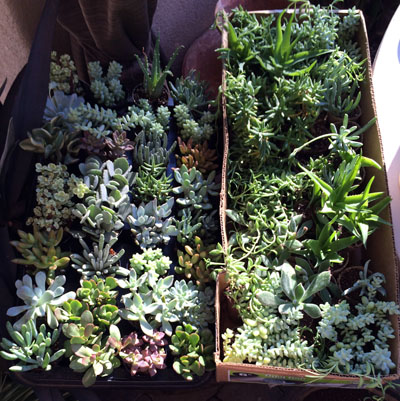
Either way, it sold out quickly.
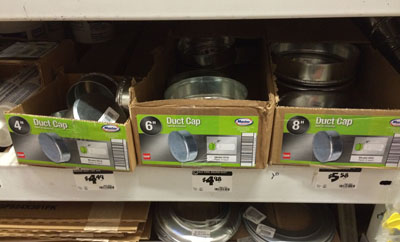
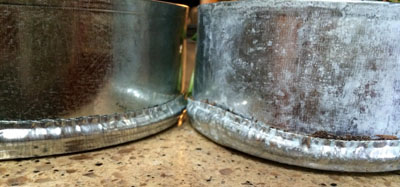
I did the “crafty” part ahead of time. I turned shiny bright galvanized duct caps (found in the plumbing department at Home Depot) from shiny and bright to tarnished and rustic looking.
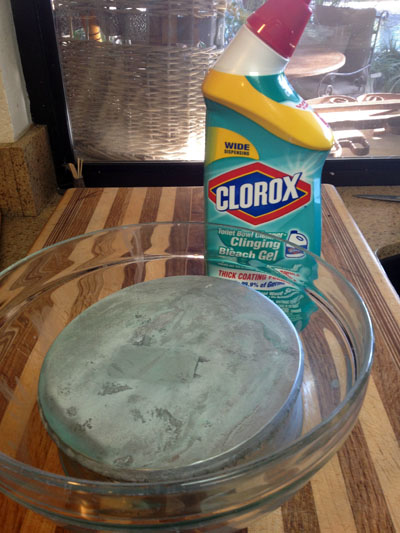
To do so, I coated the outside of each galvanized cap with Clorox toilet bowl cleaner. I let that sit for 48 hours and then washed it off.
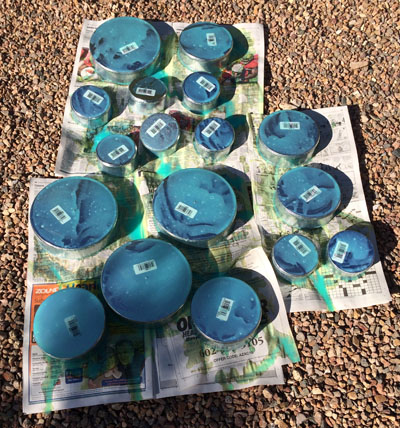
After testing the process on one – I did the rest of them out in the yard. I know that the guys working on the front remodel think I’m crazy.
They may be right.
Crazy like a fox!
October 25, 2013 2 Comments
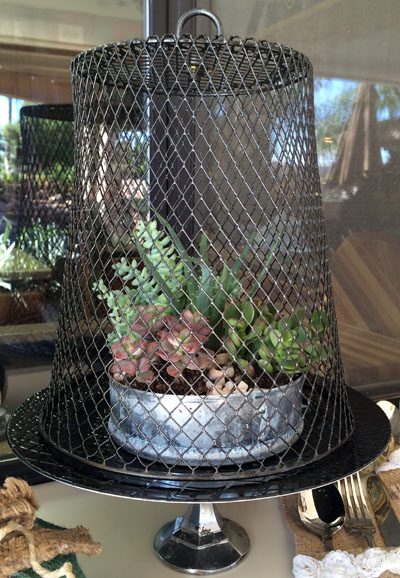
dollar store finds turned into…
… a Mercury Glass Pedestal with a chic Wire Cloche
(*For links to all the craft projects please scroll to the bottom)
Here is how easy this craft is –
1. Drive to a Dollar Store near you.
2. Buy a “crystal” candlestick, a glass plate, and a wire trash basket for grand total of $3.00
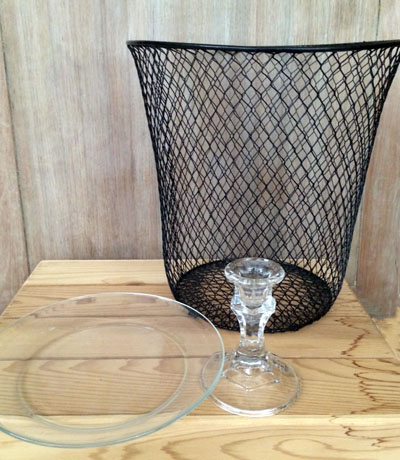
3. Get back in the car and drive to a hardware store in your neighborhood.
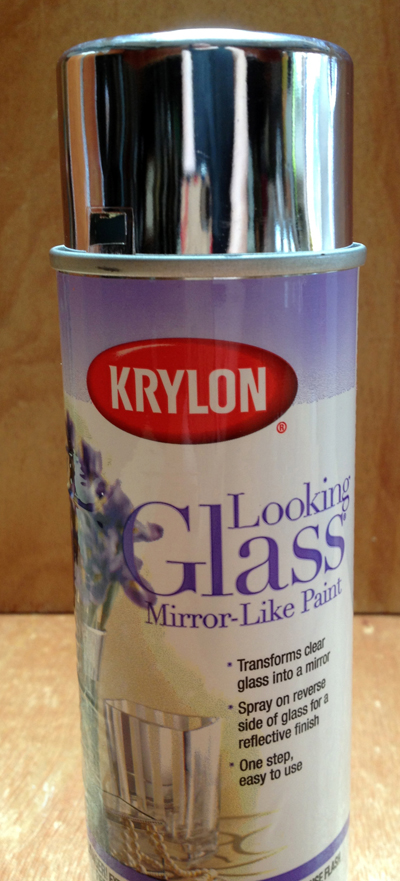
4. Buy a can of Krylon Looking Glass spray paint, a lamp finial, a nipple to fit the finial, and a nut to fit the nipple.
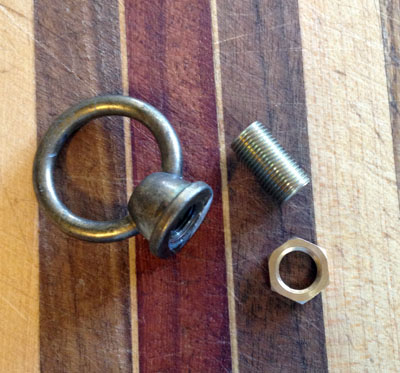
5. Return home and make this 5 minute craft that looks like a million bucks.
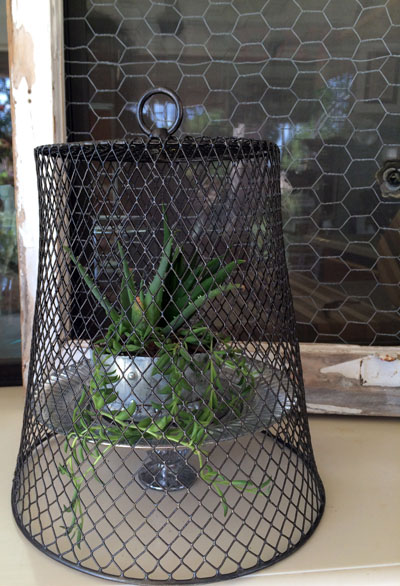
It really is that easy.
This was one of the most popular crafts at the 2013 Fall Craft Party.
Here is how you do it:
October 24, 2013 3 Comments
another chili recipe
Once I made the decision to serve chili at the 2013 Fall Craft Party, I knew I wanted one with beef and one with chicken. I already have a Favorite Chicken Chili recipe, but if I made that, then I wouldn’t have a new recipe to blog about!
(*For links to all the craft projects please scroll to the bottom of the page)
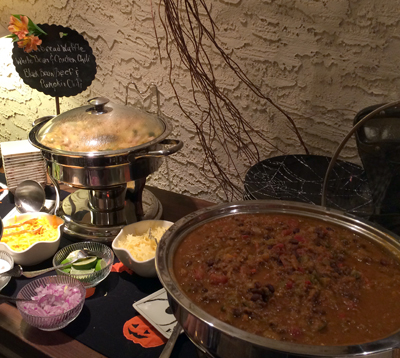
And, that my friends, is why I came up with this recipe.
Because I’m always thinking about you, your happiness and well-being – your desire for new and tasty recipes. That’s how I roll. It is who I am.
OK, enough of that, on to the recipe!
October 23, 2013 3 Comments
Fall craft #1
The first craft we made at the 2013 Fall Craft Party has a bit of a back-story attached to it.
(*For the full list of crafts links – scroll to the bottom of this post)
Like all the crafts, I found the idea for this first one on Pinterest.
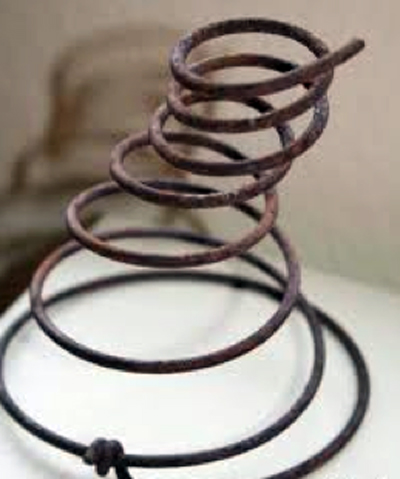
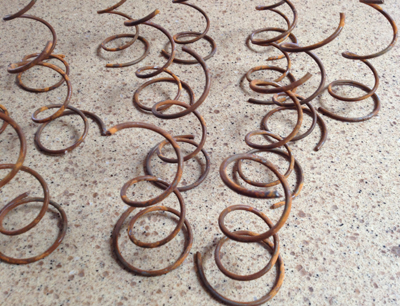
It uses a rusty spring. Which is fine and dandy, but exactly where does one find a bunch of rusty springs? Hmm?
Coincidentally … Dave and I had talked about getting a new mattress set for our bed. Hey, box-spring mattresses have springs! Maybe I could buy that new mattress set, sooner, rather than later and pull apart one of the old box springs and rip out its springs!
The new mattress set arrived the afternoon before we left for San Francisco, back in early October. I had the delivery guys haul away the old mattress and one of the box springs (king beds take two half-king-size box springs.)
As for the remaining one – yep, I went to town on that thing!
Maybe I should not say that I “went to town on it” because that makes it sound as if it was an easy task.
It was not!
The springs are attached to a stiff wireframe with very strong wire doohickeys. I had to pry each one off the wireframe with pliers – it took forever and resulted in some pretty scratched-up hands!
On the other end, the springs are attached to the plywood with very strong staples. I had to cut the wood slats off the frame to get to the underside and be able to take out the staples.
So, once I’d gotten the entire row of springs disconnected from the wireframe, I then took a saw to the wood and cut out an entire section at a time.
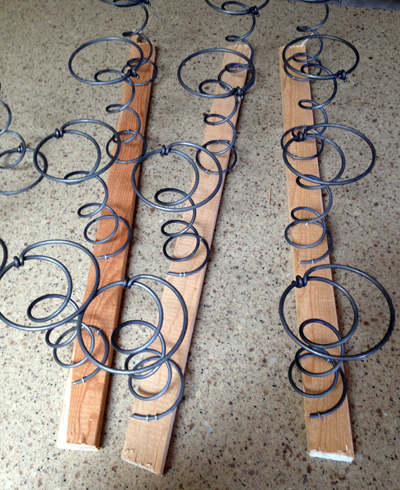
Next, I used a screwdriver to pry up the staples and then used needle nose pliers to yank the stubborn staples out.
Yeah, it took hours, but I prevailed!
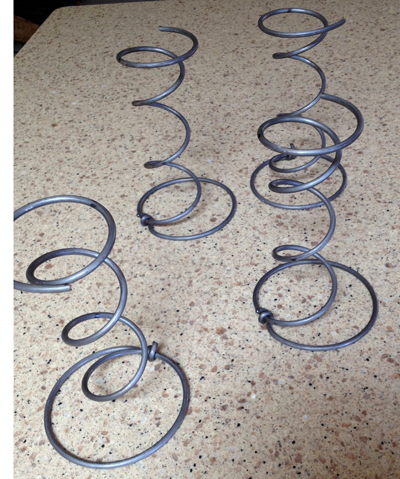
Next problem was, that the springs were too wide at the bottom and overall they were too large for what I needed them for.
Luckily for me, the masons were building my firepit (the 8th AND Absolutely FINAL firepit of this house!) in the front yard. I placed all the springs in a box, put on my best “damsel in distress face” and took them out to the guys.
They were super kind and cool about it and used a tool to cut off the large end of each spring for me.
They may have figured out they’d been duped and tricked to think I was helpless when, only moments later, they witnessed me hauling the torn up box-spring out to the construction dumpster which currently resides at the end of my driveway, and tossing it in like it was an empty box or something.
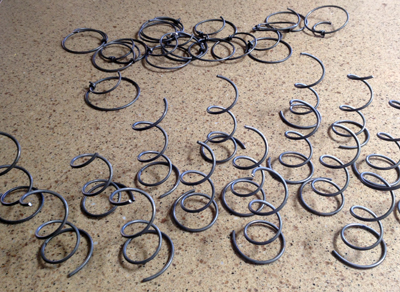
No Matter! Eighteen perfectly sized springs later … Victory is MINE!
Now, what to do about the need for rusty springs!?!? No problem, I just threw them in a flower bed, out back, where the sprinklers come on twice a day.
When we came back from San Francisco, a mere five days later…
Absolute Perfection! Now about that craft…
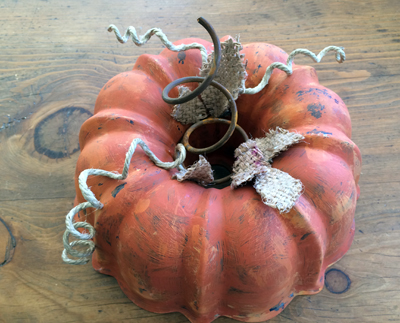
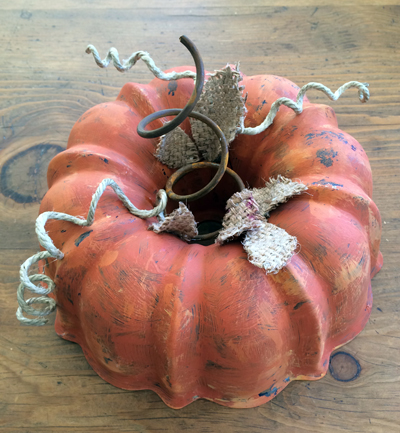
Bundt Pan Pumpkin
I love everything about this craft. The fact that it uses a beloved kitchen item and turns it into a beautiful yet rustic holiday item, is just too good to be true.
It is even quicker and easier (once you have a rusty spring) to make than an actual Bundt cake!
October 22, 2013 10 Comments
back burner
Something highly unusual happened on the way to my 2013 Fall Craft Party.
I sorta forgot about the food.
Honestly, it completely slipped my mind … until the morning of.
That is seriously out of character for me!
Food is always the main thing that I plan nearly every party around. It’s my centerpiece, the reason I have a party in the first place.
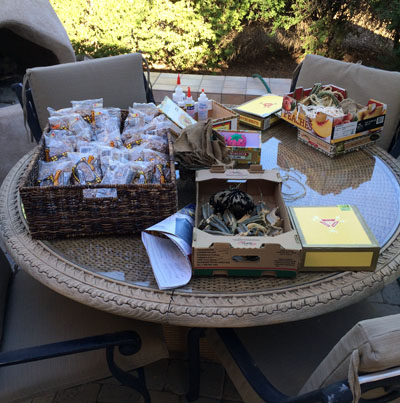
This time I was so into the craft aspect; what we’d make, collecting the necessary supplies for each project (9 in all!), deciding how to display each option, writing up and printing out the instruction sheets for each.
Tallying up my expenses and figuring out how much to charge for each craft – OK, that means high-level math was involved, so you can just imagine how many hours of my valuable time that took! Dear Lord, no wonder I forgot about the food!
Anyhow, the morning of the party, I tossed around ideas – a large table of appetizers is always fun but it’s too time-consuming to put together within my restrictive 9-hour time frame.
Chili! That’s the perfect solution!
Exceedingly easy to slap together. Plus it’s tummy-warming and satisfying on a nice October evening.
So chili it was. I jumped in the car and flew into Trader Joe’s; bought a bunch of flowers, cheese, crackers, wine, juices, chili fixings, and sweets.
And that was that.
Here is the first of two chili recipes I’ll be sharing with you… then, later in the week, we’ll get to the crafts.
If the portions in my photos look off from the portions I list on the recipe – I doubled mine – remember… I was feeding 24 lovely ladies dinner.
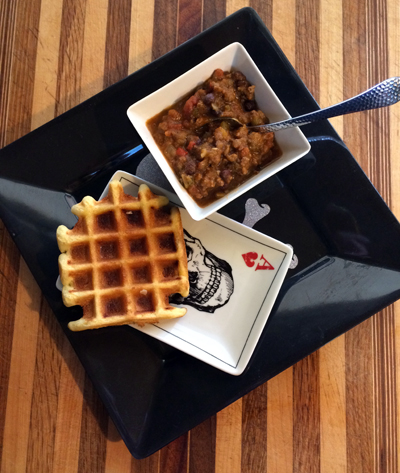
And if you are dying to ask – “What is that waffle doing alongside your chili?”
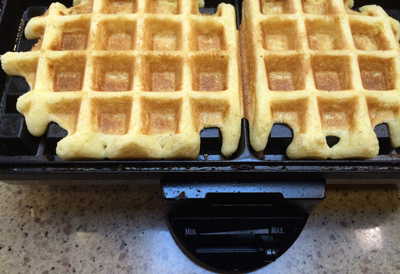
Those my friends are a cornbread waffle! Honestly, just pour the cornbread batter into your waffle iron, and presto – cornbread waffles – golden crispy goodness! No messing with a muffin pan, just cook them up, place them on cooling racks and then reheat in the oven until ready to serve. Easy as can be.
Wish I’d have thought of it – but no, I found the brilliant idea on Pinterest.
October 21, 2013 5 Comments