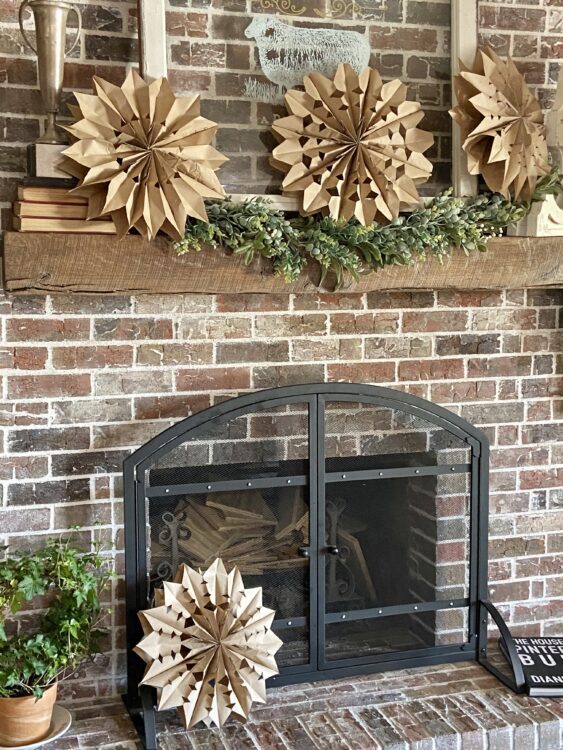
easy paper-snowflake craft
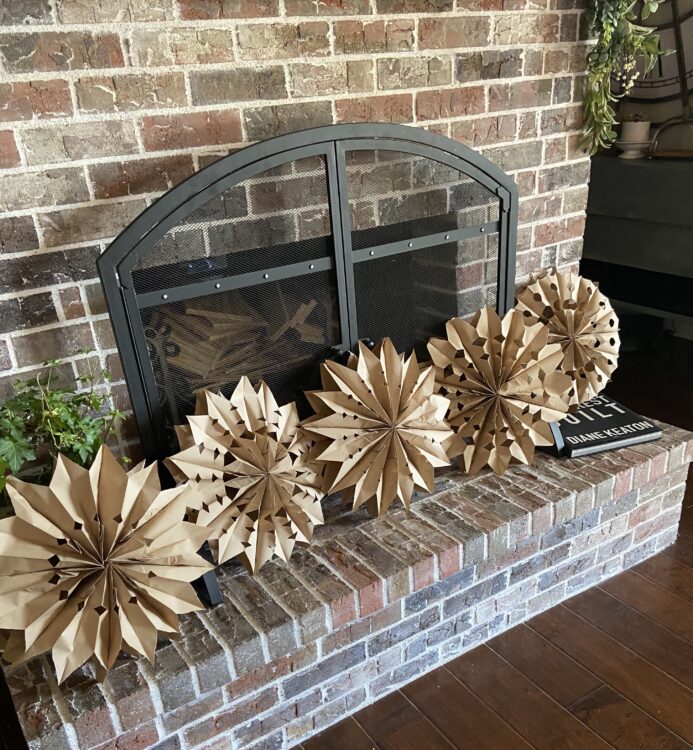
I honestly can’t recall the last time I posted a craft. You may recall that I used to host craft parties at my home each spring and fall from 2012 – 2014. My last party was nearly six years ago on October 12, 2014. How does that much time go by so quickly? I decided to get crafty for my son, Connor’s, birthday dinner and make some paper snowflakes out of brown paper lunch bags.
I had purchased a huge package of the lunch sacks at Smart & Final to use at Chanté and Cody’s wedding, but that project was abandoned, leaving me with 250 paper bags. I knew that they would come in handy one of these days!
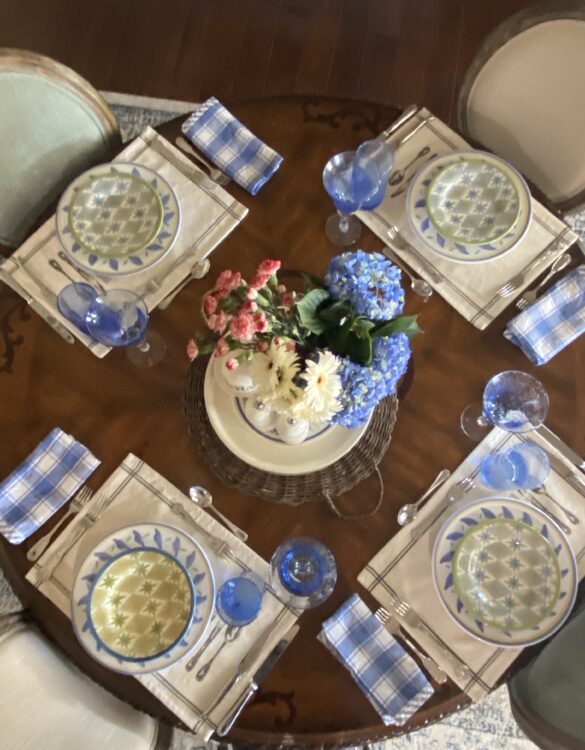
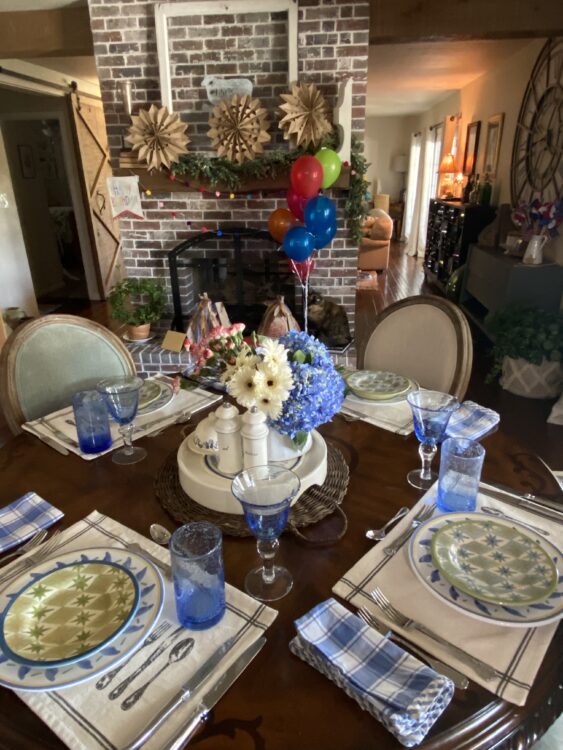
This was the tablescape for Connor’s intimate family Birthday Dinner. Recipes in the coming days.
Easy-Peasy Paper Snowflakes
Supplies to make 1 Paper Snowflake
- 8 brown or white lunch-size paper bags
- Glue gun and glue sticks
- Scissors
- Optional: Spray paint
Instructions:
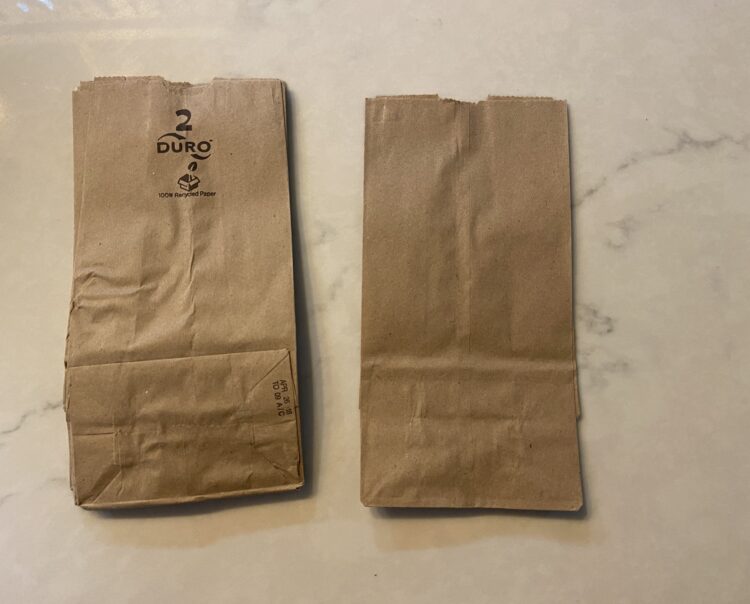
Place the first bag with the flat/smooth facing side up on a work surface. Stack the remaining 7 bags with the bottom flap-side up, as shown.
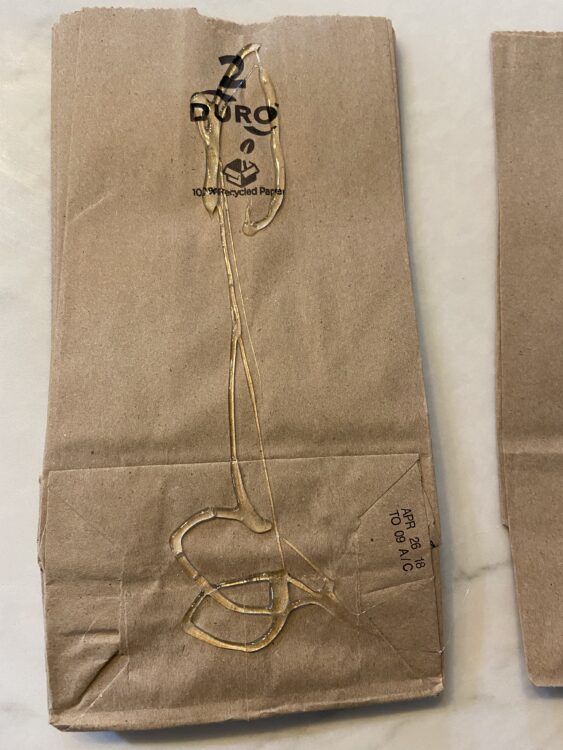
Use a glue gun to apply hot glue down the center, to the top flap-side up bag, with a little extra on the bottom flap portion of the bag.
Place that bag evenly on the single smooth side up bag, and press down to adhere the glue.
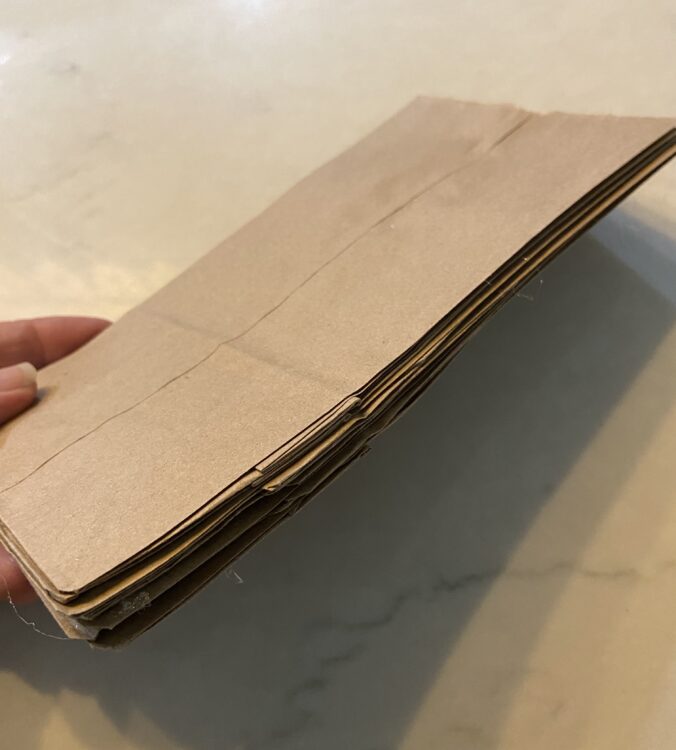
Repeat with the remaining 6 bags until all the bags are glued together in one stack.
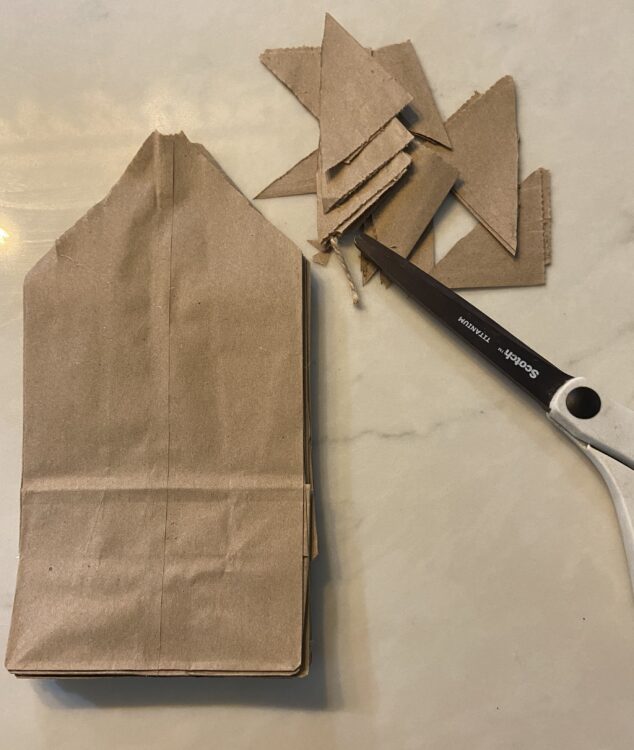
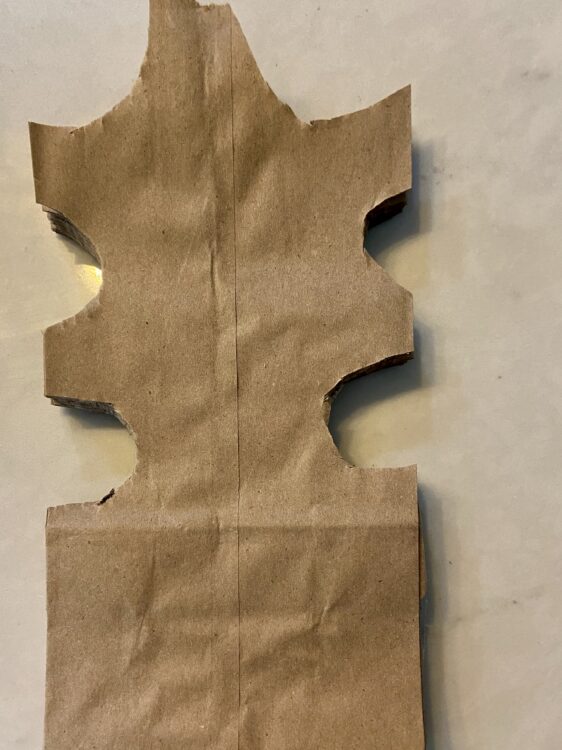
Use the scissors to cut off the corners at the top of the stack of glued bags. Cut at a sharp angle or just snip off small corners, it’s up to you to get the look you want.
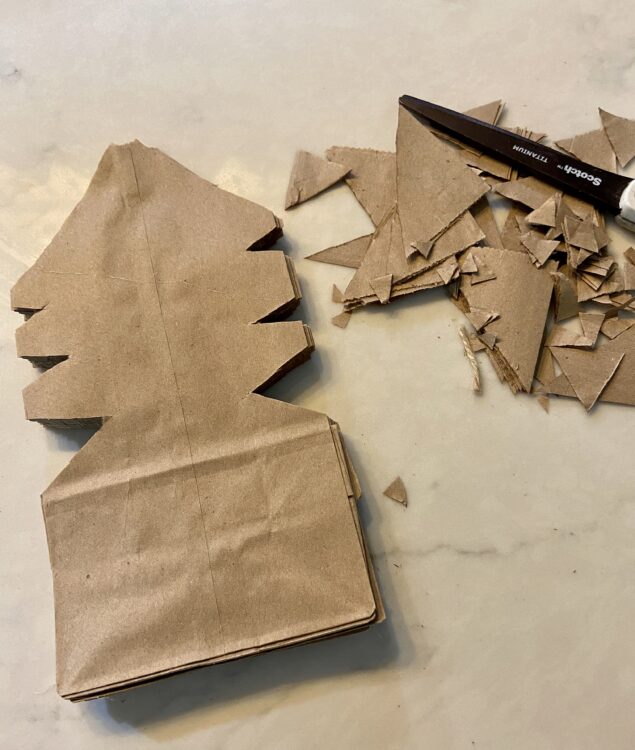
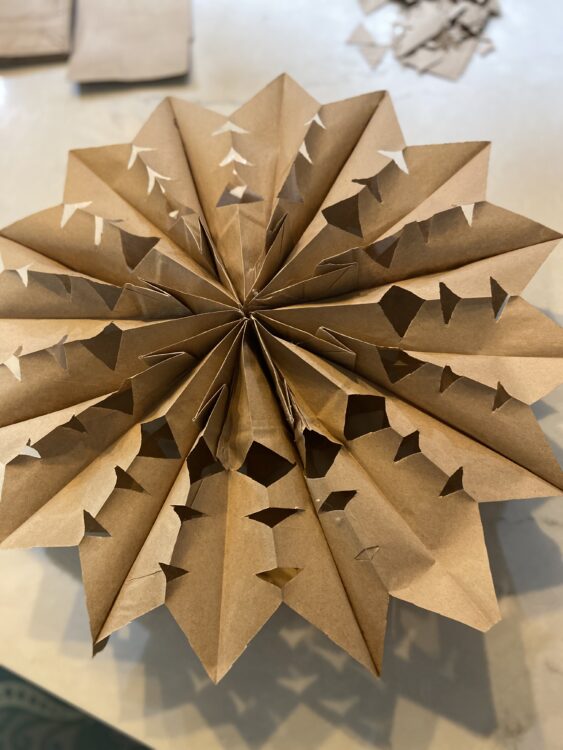
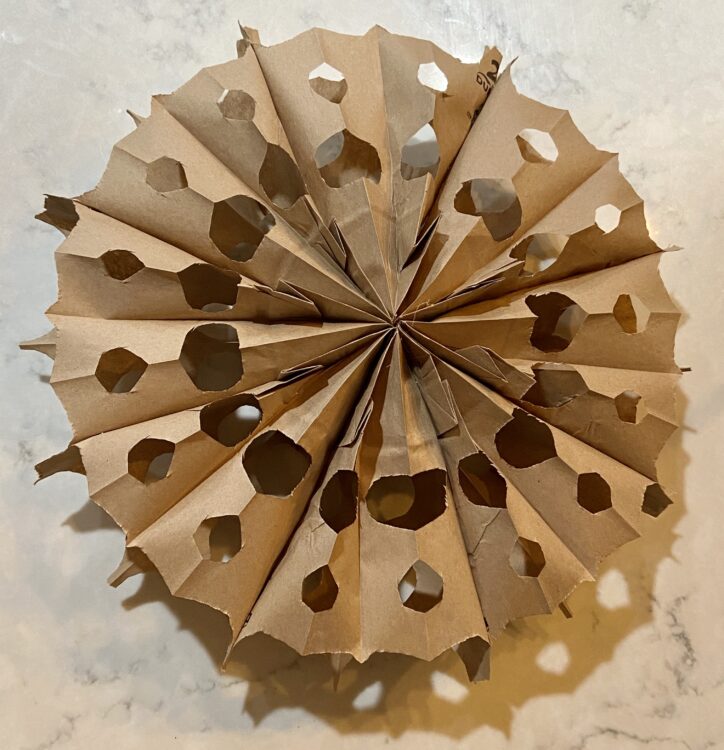
Next, use scissors to create matching cutouts on each side of the stack of bags. Make as many cutouts as you like. You can see the results in the photos above and below, some only have one cutout and others have 3 or 4. Each creates a unique snowflake.
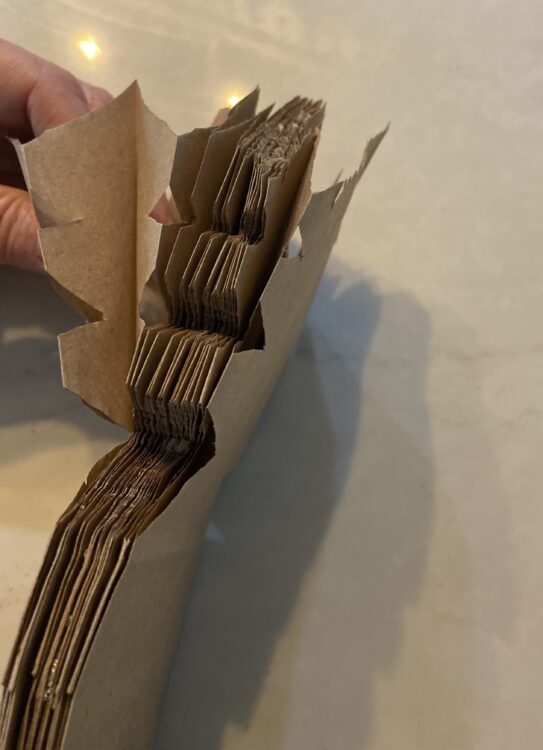
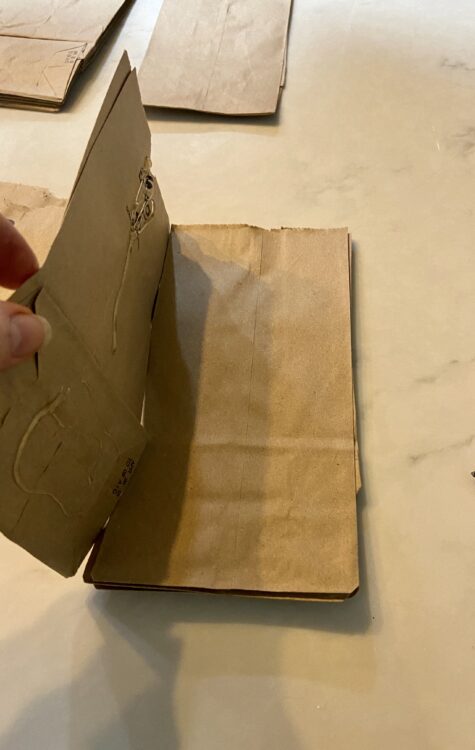
Once you’ve made all the cuts you’d like, open up the bags –
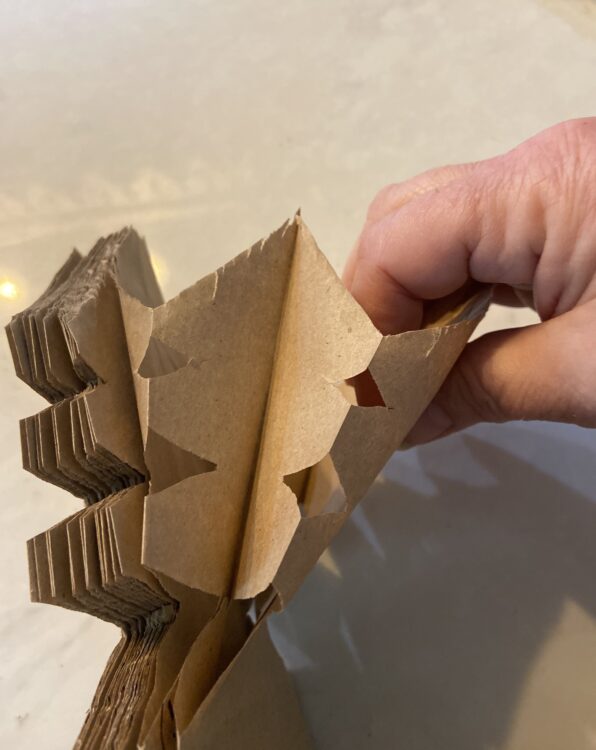
– by grasping the outer bag on each side of the stack to open up the snowflake.
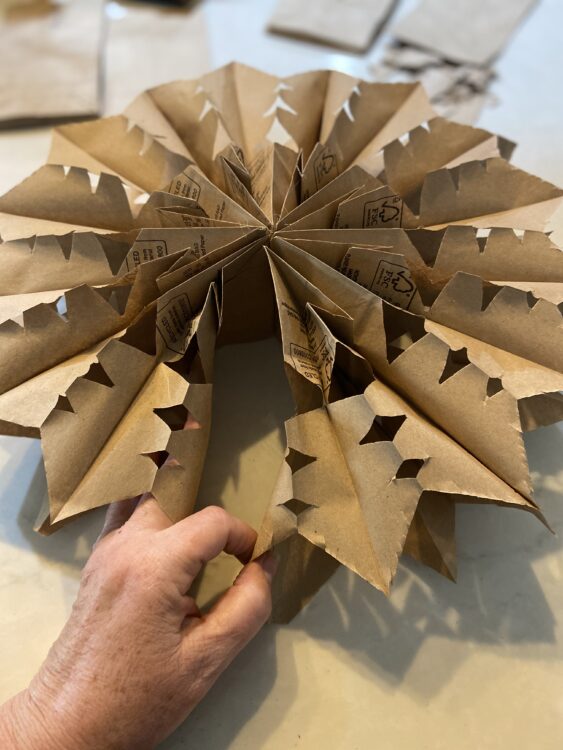
Use the glue gun to spread glue on one side and press the two sides together to complete the snowflake.
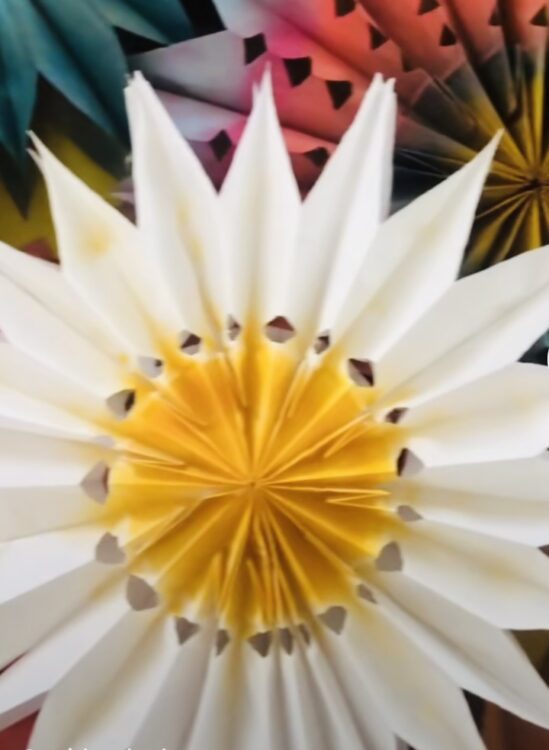
You can get creative with your cuts, and make curved half-moon cuts instead of triangles, or whatever else your creative mind comes up with.
Another way to get creative is to use spray paint to decorate your snowflakes further. If I had white lunch sacks, I’d definitely spray the center yellow to make these sunflowers, so cute!
This is a great summer craft for the kids. You can find low-temp glue guns for them to use. They are a bit safer for kids than the high-temp guns I prefer to use.


0 comments
Kick things off by filling out the form below.
Leave a Comment