
CA to TX – day one
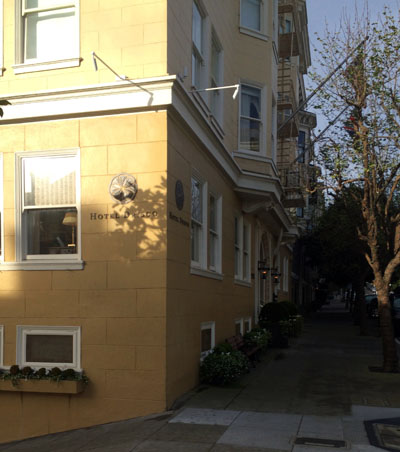
Dave and I arrived in San Francisco on Wednesday night. Marissa picked us up from the airport and we went directly to her apartment to help with some cleaning (me) and spackling (Dave). After that, we spent our last night (at least for a while) at our favorite Pacific Heights hotel, The Hotel Drisco.

Bright and early on Thursday morning we hit the ground running.
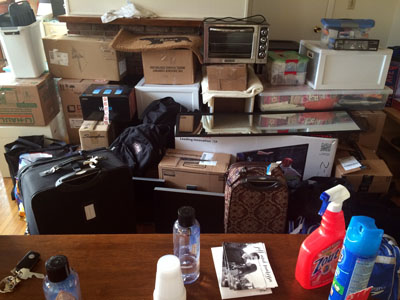
Dave and Jeff went off to pick up the Pensky moving truck, while Marissa and I took apart the bed and kept on cleaning.
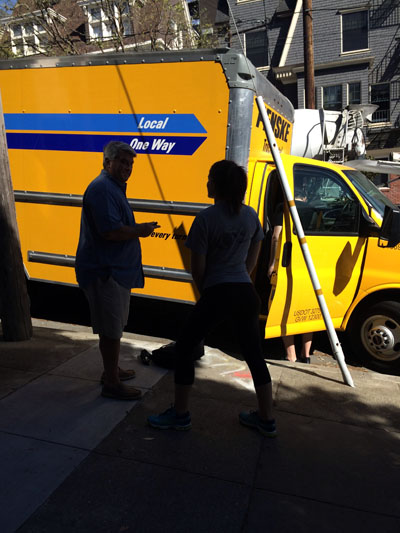
Once the boys returned, the real work began. Marissa and Dave went up and down two flights of stairs dozens of times with boxes and furniture, while Jeff packed it all into the truck and I … continued to clean the apartment.


February 27, 2015 4 Comments
wedding dress shopping in SF

Marissa and I, along with her maid-of-honor, Kaley, and two of her five bridesmaids, Petra and Jessica, went wedding dress shopping on Saturday.
We visited two bridal shops and although the girls and I thought Marissa looked beautiful in nearly every dress, we have yet to find The One.

Marissa’s attendants were so helpful in finding dresses to try on! I just sat back and watched as they helped her choose dozens of dresses. What I loved most was how open she was to their choices. I knew some were not her style, but she gave all the dresses a fair shot.
I am not permitted to show you, Marissa, in any of them, but these “bottom half” photos will give you a small glimpse into our Saturday.

November 10, 2014 3 Comments
housekeeping trick…learned the hard way
No Friday Funnies today. In their place a “Not At All Funny!”
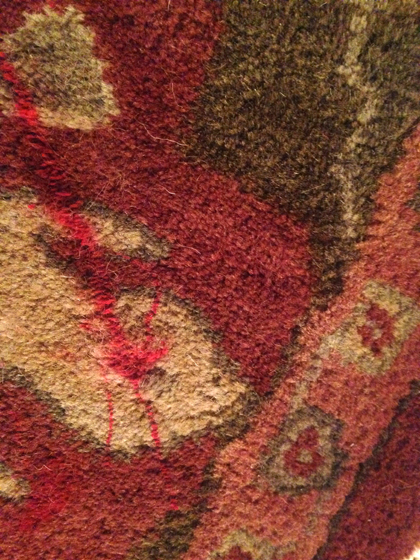
About this time last year, I bought a housewarming gift for Marissa and Jeff, a beautiful 8×10 Persian-Style Rug from Pottery Barn for their new place.
If I recall correctly, we bought it the first week of June 2013, it was on back-order, so it arrived the last week of June.

Nearly a full year goes by and they are enjoying the rug, all is well. Until the evening of May 4, 2014 (my wedding anniversary, by the way) when I receive a text from Marissa at 9 PM,
“I spilled nail polish on the rug & I don’t know what to do!”
Not yet realizing the rug she was speaking of was The Rug, I reply,
“Reminds me of when I had to replace the carpet in your bedroom with wood floors – I honestly don’t know – you should probably look it up on the internet.”
At this point, I’m really thinking, WTH? This is the 4th time that my otherwise intelligent daughter has spilled (or dropped a full bottle) of nail polish in her short life! When is she going to learn?!? Oh, and Happy Anniversary!
I should mention here that Marissa did call us to wish us a Happy Anniversary, earlier that day and that she had sent a beautiful card. She also went to great lengths to try not to text me about this crisis on my special day, by texting others first, but since they aren’t her mom…they, of course, were no help!
Then she responds, “I did. It said the rug is ruined.
At that very second, it dawns on me…and I reply, “Exactly where in the house did you do this?”
I get the reply I most dreaded, “The living room. The nice rug.”
“Seriously??? Start blotting it with paper towels. Do Not Rub! Blot!!!”
“I did that.”
“Keep Blotting Until Nothing shows up on the paper towels, then send me a photo. Plus you better lift up the rug and make sure it isn’t seeping through to the wood floors.”
Then I get the next text, with a photo. “Not seeping through. Didn’t want to tell you, but it’s on the leather couch too. I might also need help with that.”
If you have kids, of any age, you know what I was thinking and feeling.
“I’m gonna wring her neck!”
“She drives me to drink!”
and basically, just…
“WTH!?!”
I call her and we agree that she will leave it alone and I will try to take care of it when I visit over Mother’s Day weekend, a short 5 days from then. In other words, Mom To The Rescue. (We agree that the couch is a non-issue because it’s a piece of cr@p that they bought on Craig’s List. It’s not really even leather, more like pleather, so I’m not wasting my time and energy on it.)
We research more and find several sites that suggest using aerosol hairspray or rubbing alcohol to lift out the polish, without lifting out or fading the dyes in the rug. She buys both.
After the full day of Amazing Race San Francisco, the proposal, and dinner with the engaged couple, I give them my hotel suite and I sleep at their place. That evening I get to it and do my best to get the nail polish out without lifting out the dyes on the rug.

Turns out the thing that worked best was the rubbing alcohol. I tried using a rag, paper towels, cotton balls, and cotton facial cleaning pads. The cotton balls worked pretty well, but the cotton facial cleaning pads worked best.
May 23, 2014 6 Comments
the proposal!

This past Saturday was a very big day for our family. Mentally, I had been a little MIA for the past week or so … getting ready, emotionally, for the weekend!
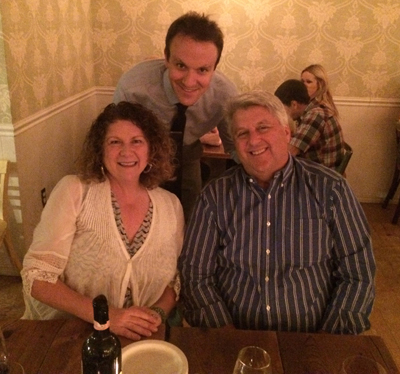
Our daughter, Marissa, got engaged! She is my firstborn … and a truly magnificent daughter!

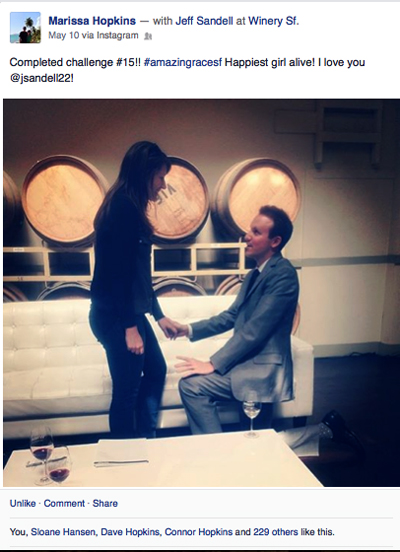
This is Marissa and her handsome fiance’ Jeff.

And this is their engagement story … as seen and experienced firsthand by a proud, excited, and loving mom.
On Thursday, April 24, 2014, Jeff flew in from San Francisco to take us to dinner and ask for Marissa’s hand in marriage.
He was so sweet and said the most beautiful and wonderful things about our beloved daughter. After we said, “yes, of course,” Jeff explained his proposal plan and asked me to be a part of it. What an honor!

You see, Marissa and I have been fans of the television show, The Amazing Race, ever since its debut in 2001. We’ve always thought that we’d be the perfect duo to run the Race and that certainly we would be the winners and take home the $1 million prize money!
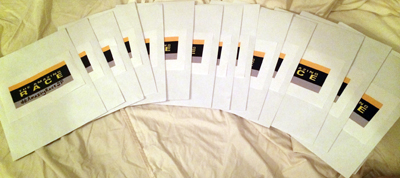
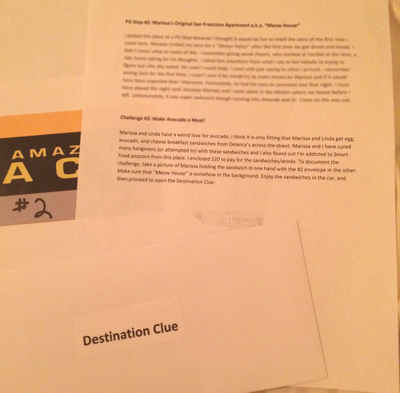
Jeff created an “Amazing Race San Francisco” for us to run… unopposed … so we’d be sure to win! He had 15 envelopes containing clues and challenges for us to complete.
We began at 9:00 Saturday morning and hit the ground running.
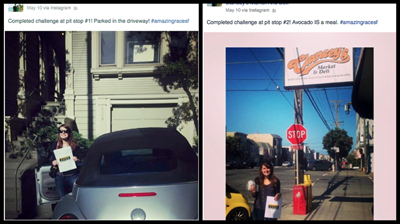
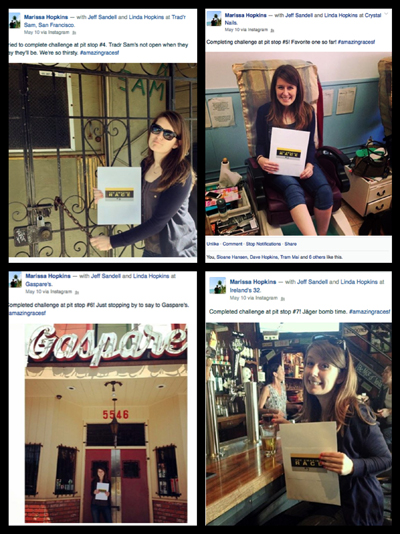
Jeff put so much time, thought, and effort into this endeavor – it truly blew me away! He even had the forethought to have me take a photo of Marissa at each “pit stop” holding the corresponding numbered envelope and then post it on Instagram and Facebook. Each post included the hashtag #amazingracesf, so that he could follow our progress as we traveled from one side of the city to the other – over a period of about seven hours.

It also became a great way of letting their unsuspecting family and friends know that something very cool was happening and that something even bigger was on the way!
And yes, you can still log on to Instagram or Facebook, put in #amazingracesf, and see the whole event as it unfolded.
May 14, 2014 10 Comments
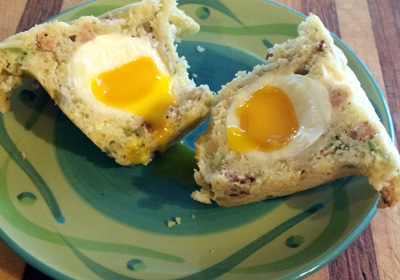
“The Rebel Within” Knockoff
There is so much I have to tell you about this recipe that I hardly know where to begin. So, how about at the beginning?
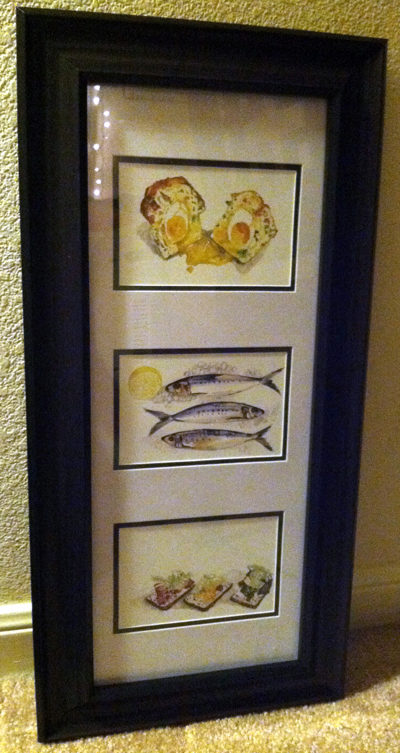
Almost exactly one year ago, on January 30, 2013, I wrote about how Marissa and I had gone into a kitchen store in San Francisco and found wonderful watercolor postcards of famous dishes from various San Francisco restaurants. We framed the postcards and they now hang in Marissa’s kitchen. One dish, in particular, caught our fancy. It is a breakfast muffin from Craftsman & Wolves.
The next day, 1/31/13, I tried to recreate “The Rebel Within” at home. Although the end product was tasty, it was not at all what I was looking for… there was no runny egg yolk in the middle of a baked muffin.
Fast-forward almost a year to January 22, 2014, when I wrote about how Marissa and I finally went to Craftsman & Wolves and tasted “The Rebel Within” for ourselves and about my renewed passion to try to recreate it at home.
Just as I had done back in January 2013, I went online to research what I could about how it would be possible to bake a whole egg in a muffin and get it to be “soft-boiled” with a runny yolk.
First, I stumbled upon this website and read up on “egg cookery” – I then found out that two wonderful women had “cracked the code” to The Rebel Within. They went through dozens of eggs and baked more muffins than I would have ever had the patience to bake… and they did it!
Tuesday morning, I used their method. The result?
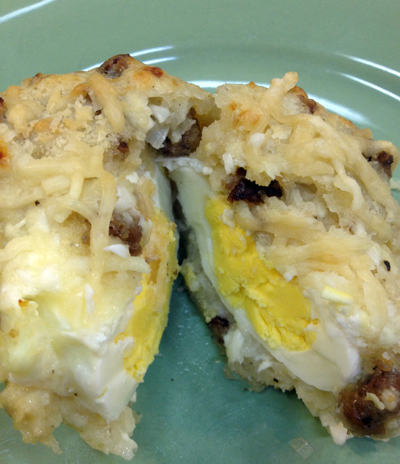
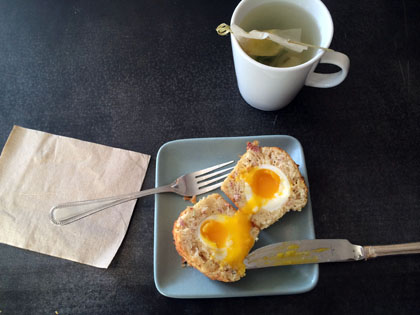
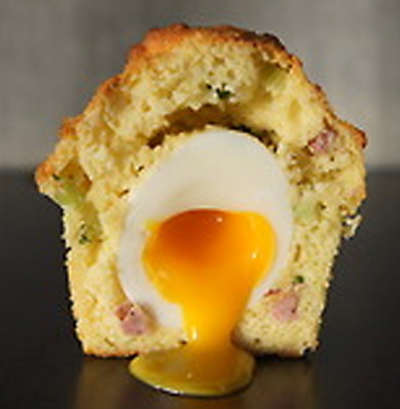
Although my “Rebel Within” was not as beautiful, as perfect, or as tall and well-shaped as the muffins at Craftsman & Wolves or as the muffins the brilliant women at Follow Me Foodie baked, it tasted exactly like the muffin Marissa and I enjoyed at Craftsman & Wolves! And the yolk – it was perfectly runny!
If you would like to make this masterpiece at home, I’ve posted the recipe here, the majority of which is copy/pasted from the Follow Me Foodie post, with just bits and pieces of my own additions and omissions.
I still strongly suggest you go to the Follow Me Foodie recipe post and read from top to bottom about their trials and tests and all of their tips and suggestions. It’s truly amazing and a really good read, even if you do not plan to bake the muffins. There’s a whole boatload of interesting information, dedication, perseverance and patience to be seen there!
If you don’t have the time to read it all, allow me to let you in on a few of the notes that I found to be more important:
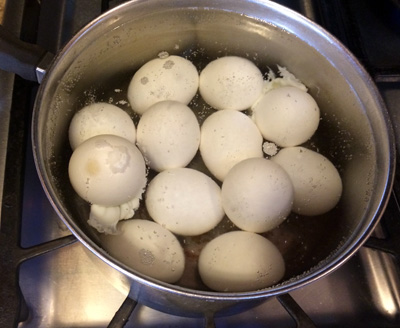
The recipe makes six muffins. Even so, I suggest you start with 12 eggs, as I did when you’re making the Extra-Soft Boiled Eggs. Of the 12 eggs I started with, seven turned out perfectly.
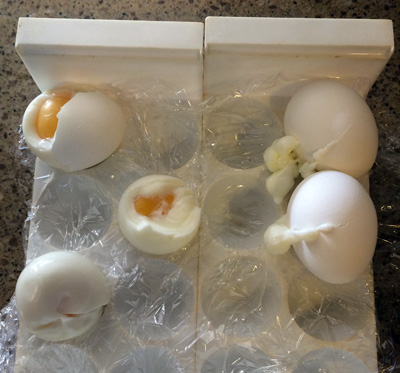
Another two would have been “usable” but were less than perfect … and the remaining three … completely unusable.
It is imperative that you “warm” the eggs before dropping them in the boiling water. Use hot tap water to do so. I actually brought the eggs to room temperature first, and then let them sit in the hot tap water for the amount of time it took the water that the eggs would be cooked in to come to a boil. Even so, two of the eggs cracked almost immediately as they were placed in the boiling water. I took those out and discarded them straight off the bat. They were two of the “completely unusable” eggs mentioned above.
The Follow Me Foodie women used bacon for their recipe, I used breakfast sausage, just as they do at the C&W. As much as I love bacon, I’d suggest going with sausage for this.
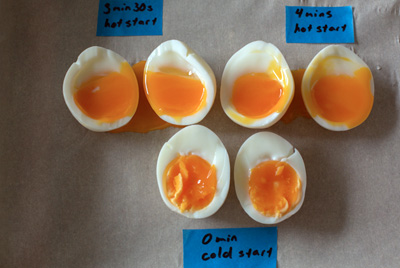
Be certain to boil the eggs for EXACTLY 4 minutes and 30 seconds. If you want to achieve that runny yolk, this is the most important part of the recipe.
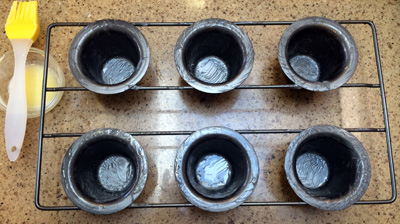
The Follow Me Foodie women suggest that you either use a popover pan or a large muffin tin. I have 2 popover pans, so of course, I used a popover pan. I can’t begin to imagine how it would work in a muffin tin. It wouldn’t be tall enough.
If you don’t own a popover pan, buy one or borrow one! If you live anywhere near me, you can borrow mine.

Once the muffins were done baking and had cooled, I found it easiest to remove them by placing a baking sheet on top and flipping it over, then gently lifting the popover pan off. Because of how much they overflowed, I feared that the tops would rip off if I tried to “lift” them out of the molds individually. This is the method that worked for me.
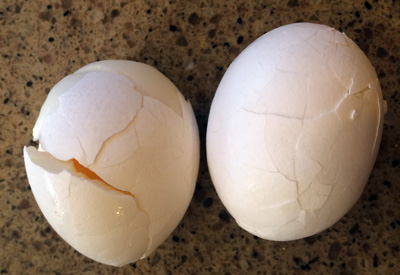
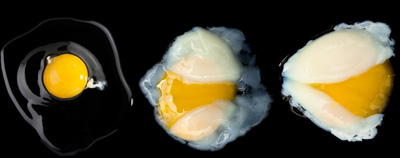
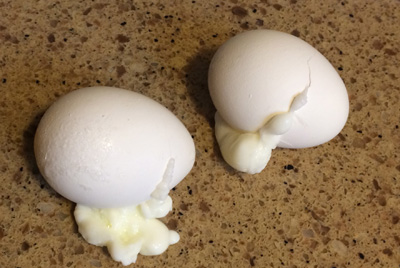
Finally, when peeling the extra-soft boiled eggs, take care to gently crack all over. While peeling the last couple of eggs, my mind was wandering and I failed to do so. The egg on the left is what happened as a result of not cracking all over. The egg on the right is an example of how to do it correctly.
Oh, and to those of you who so generously and selflessly volunteered to be taste-testers … I’ll have to soft-boil and bake up another batch. Those first six muffins are long gone, my friends!
February 6, 2014 8 Comments
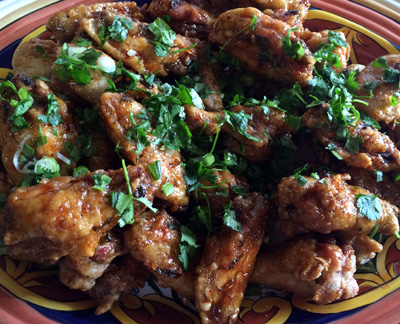
Homemade San Tung “Dry-Fried” Chicken Wings
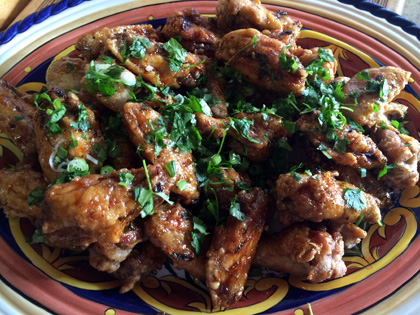
San Tung is that restaurant in San Francisco that Marissa and I have to eat at the night I arrive in San Francisco each and every time I visit her. It serves the famous “dry-fried” chicken wings that we crave and love.
I desperately wanted to make them for the family on Super Bowl Sunday.
After much online research and some trial and error, I have the recipe for you to make at home!
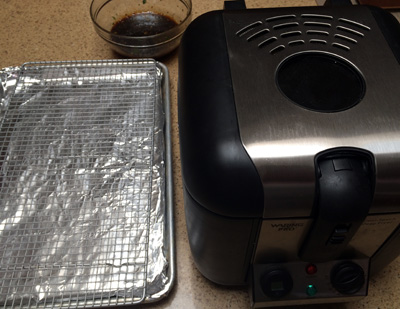
You’re going to need a large pot, Dutch oven, or preferably a deep fryer. If using a pot, you’ll also need a candy thermometer. Plus, you’ll need a couple of big bowls, wire racks, paper towels, and a baking sheet.
If you’re like me, you like your wings cut into two pieces, the drumette, and the wing.
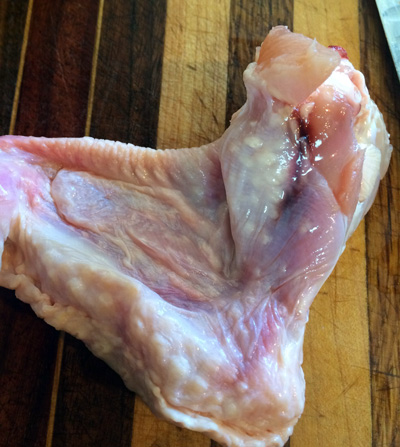
When cutting the wings in half, just cut through the skin, then bend the wing so you see where the joint is and cut right through the joint.
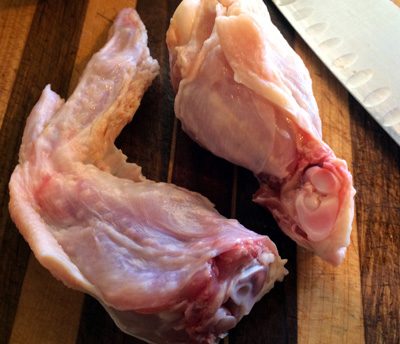
It’s easy once you find the joint and don’t try cutting through the bone. Then cut off the wing tip, there is a joint there too.
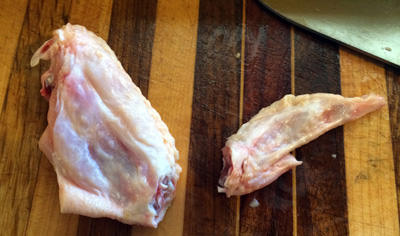
Save and freeze the tips for the next time you make chicken stock.
This recipe makes about 60 wings (30 wings cut in half) and it takes over an hour and a half to fry them all – twice. The recipe can easily be cut in half.
OK, let’s get started…
Homemade San Tung “Dry-Fried” Chicken Wings
Sweet and Spicy Sticky Sauce
1 bunch green onions, minced (green and white parts)
1 small bunch cilantro, minced
1/2 cup soy sauce
1 1/2 cups honey or agave nectar
3/4 cup water
1 head garlic, peeled and minced
3 tablespoons rice vinegar
2 tablespoons Szechuan chili sauce
Wings
8 pounds chicken wings
Salt and freshly ground black pepper
10 cups canola oil
2 cups cornstarch, divided
1 1/2 cups water
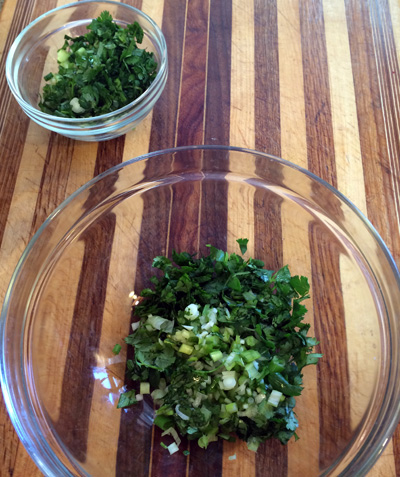
Sauce: Mix together the green onions and cilantro. Divide in half, place half in a small bowl, cover, and refrigerate.
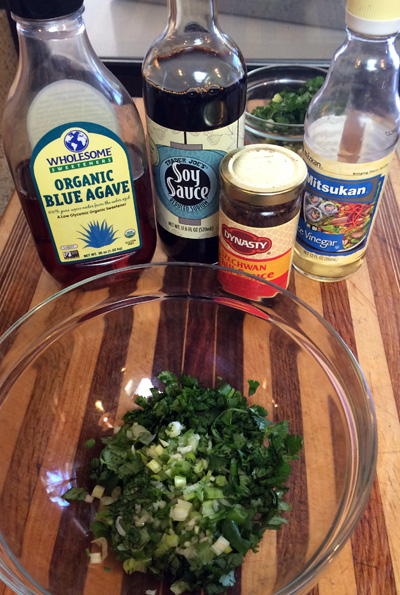
Place the other half in a large bowl and…
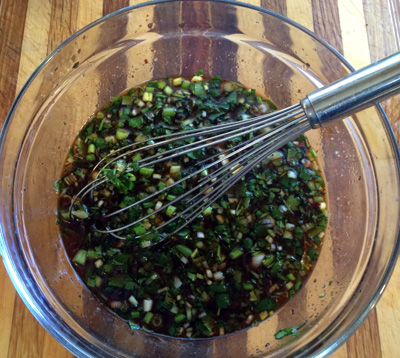
…whisk in the remaining sauce ingredients.
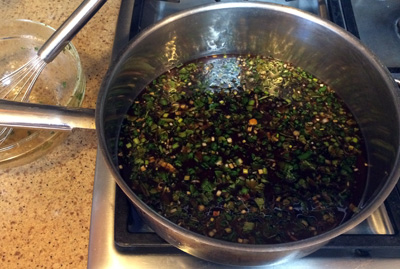
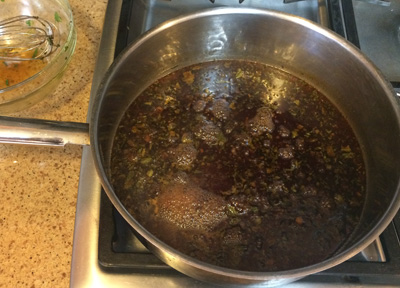
Pour the sauce into a large skillet and simmer for 10 minutes until thickened.
February 3, 2014 24 Comments
cooking in a postage stamp-sized kitchen
We return later today from a glorious long weekend, spent with Marissa and her boyfriend, Jeff, in San Francisco and Napa.

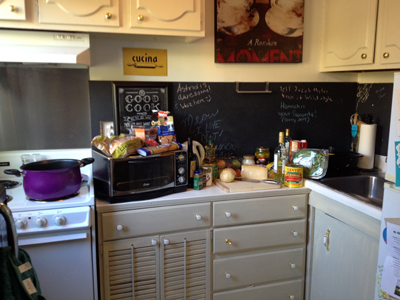
Marissa had a very busy and stressful work week, so I made dinner on Friday night in her very small kitchen. When I say small, I mean really small!
In May, Marissa moved from the Outer Sunset neighborhood to Pacific Heights. Part of the tradeoff to living closer to the center of the city was less space.
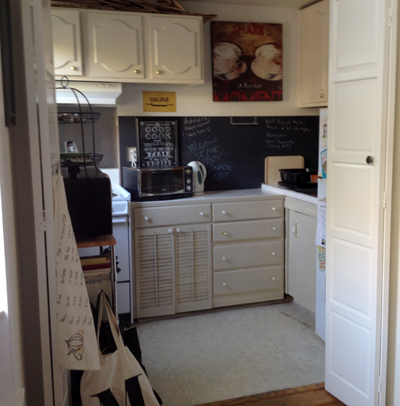
The closet-sized kitchen is only 7 feet wide by 10 feet long, with less than 25 square feet of walkable floor space and only 3 linear feet of counter space. No dishwasher, no garbage disposal, and a smaller than an average-sized refrigerator.

Speaking of the refrigerator… remember this Friday Funny I posted last week?
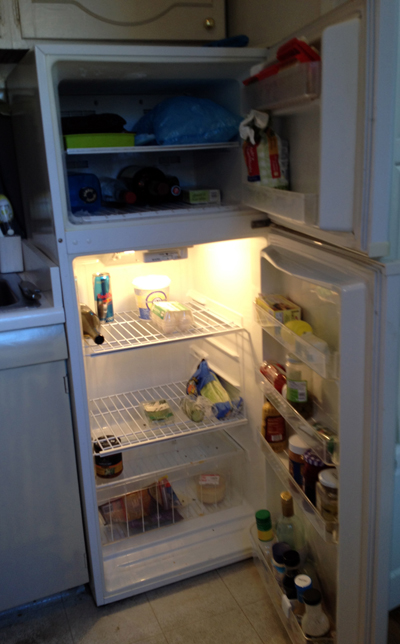
It is Marissa’s reality! Here is her refrigerator…
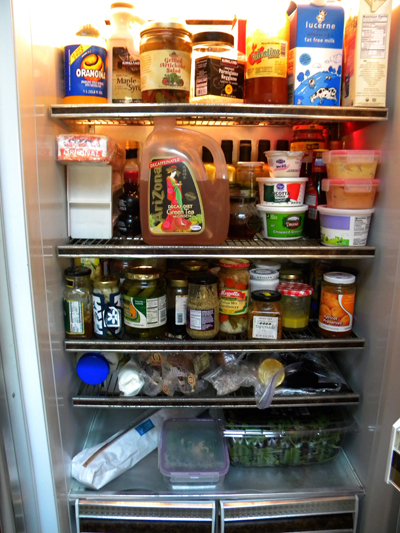
… and here is how mine typically looks. Just a bit of a contrast!
So, what did I make for dinner in the tiny kitchen, you ask?
After a quick trip to Trader Joe’s, I unpacked it all, which took up every inch of counter space, then I proceeded to make a one-pot (no drain) pasta dinner, rounded out with a salad and garlic bread. The salad recipe will be posted tomorrow.

The one-pot Marissa owned, that was big enough, had a lid with holes, for draining pasta. I needed a solid lid so I covered the pot with foil, then added the lid, for a tight seal.
October 7, 2013 7 Comments
muffin “almost there”
Here is a quote from yesterday’s post:
“So back to the drawing board. I hope to have it down by tomorrow and post the recipe and my success.”
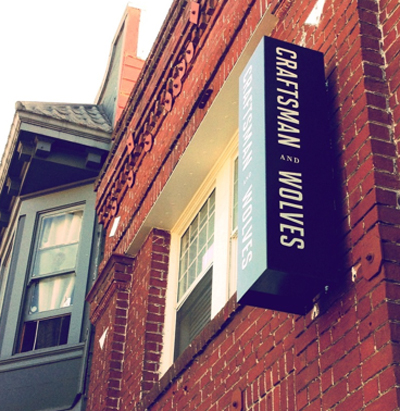
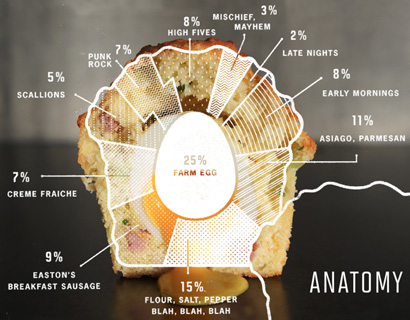
What I hoped to have down was the recipe for “The Rebel Within” from Craftsman & Wolves, a restaurant in San Francisco. “The Rebel Within” is a buttery, cheesy, sausage flecked muffin with a soft-cooked egg in the center. The egg yolk in the muffin should be soft and runny with the oozing yolk dripping like liquid gold onto the plate.
The muffin is named after a Hank Williams III song. Williams is the grandson of the legendary Hank Williams and the son of Hank Williams, Jr.
So, the big question is… did I get it right? Was I successful? Was the liquid gold running onto my plate? No. No. and No!
I really wanted to name this post “Muffin Extraordinaire” but it’s honestly only “Muffin Almost There.”

I developed the recipe by using the blueprint of the muffin that I found on the restaurant’s website. It’s a tongue-in-cheek blueprint with a hint of what ingredients to use, but it has no real portions. At least it gave me a starting point.
First, I tried soft poaching the eggs for 3 minutes in simmering water and then shocking the cooked eggs in ice water, as with THIS method. But once the muffins were baked, the yolks were firm, not even close to runny.
The second go-round, I tried only poaching three of the eggs for one minute and shocking them in the ice water. I cracked the remaining three eggs directly into the bottom layer of batter in the muffin tin.
I imagined that the 1-minute poached eggs would work and that the raw eggs would run all over the place and make a mess.
Once the muffins were baked, I anxiously cut into one of each type of muffin. The result? Exactly the same as the first time around. The yolks were cooked firm. The raw eggs did not run and make a mess, as I anticipated, they were firm right in the center of the muffin, just as the poached eggs were.
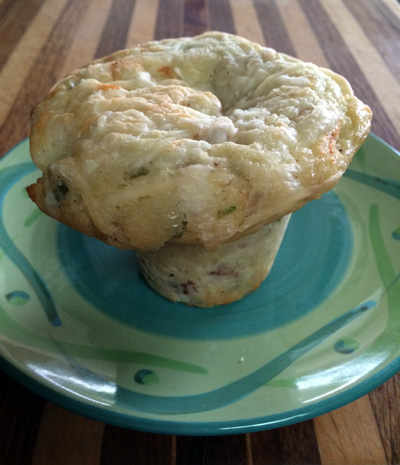
Even though the yolks didn’t turn out as I had hoped, I am going to share the recipe I developed while trying to get it right, because even without runny yolks, the muffin is AMAZING! Wonderfully scrumptious. Somehow the muffin is dense, yet still fluffy and fabulously flavorful.
Instead of naming my version “The Rebel Within” I shall name mine “The Easter Egg Within.”
January 31, 2013 9 Comments
orthopedics, San Fran, and runny yolks
The day after returning from San Francisco, I had a follow-up appointment at the orthopedics office. The x-rays showed that I am completely healed and may resume all activities, unrestricted. Yay – take that you stupid extension ladder!

I had THE best time with Marissa in the City by the Bay. We shopped, we ate, we treated ourselves to a mani/pedi, we ate, we shopped some more, and we ate…
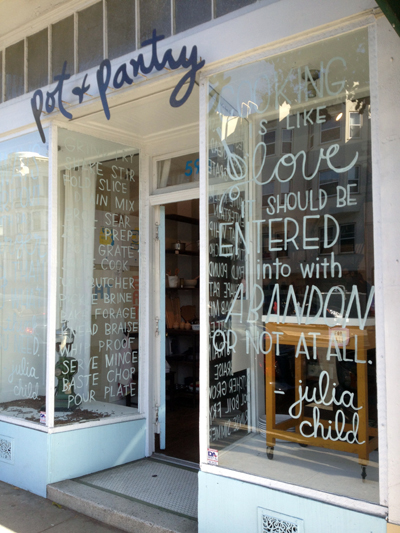
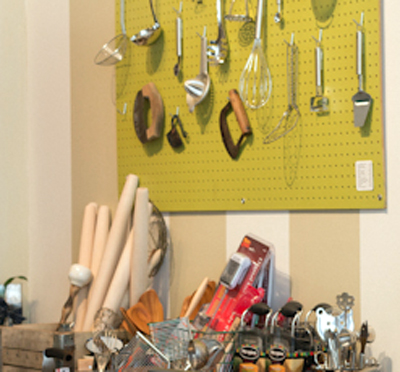
One of the stores we went to was Pot & Pantry on the corner of Guerrero and 18th Streets.
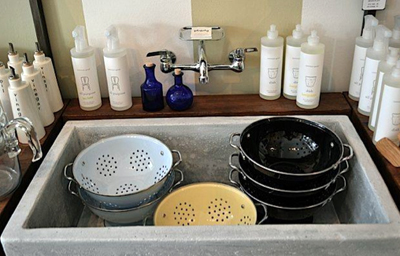
It’s an adorable little store that is deliberately designed to feel as if you’re shopping in a friend’s kitchen. Customers can buy, sell, or trade new and gently used kitchenware. It’s mostly new with a bit of vintage here and there.
I bought a couple of little things, big surprise!
While checking out, I noticed little postcard-sized cards that had lovely watercolors of food on them.
January 30, 2013 2 Comments
Pepperoni Arrostiti

As promised, I recreated the Pepperoni Arrostiti that we so enjoyed at Trattoria Contadina. The cheese-stuffed bell pepper uses three different Italian kinds of cheese; mozzarella, asiago, and bel paese. In case you haven’t heard of bel paese before…
Bel Paese – Literally meaning “beautiful country”. This cheese was invented in 1929 by the Galbani Cheese Company in Lobardy. A wax rind covers the uncooked cheese made of pasteurized cow’s milk. The small discs have a soft texture and are peppered with small holes. Bel Paese appears pale with touches of creamy yellow. This cheese is similar to mozzarella or Fontina in its mild, buttery flavor but is distinct in its body and tang. Bel Paese is versatile and easily melted.
It took two tries to get this recipe just right. The first time, I took pictures. The second time, I forgot to do so. As a result, the pictures won’t reflect the light roasting of the peppers before cutting and filling with cheese. I decided this was needed because the peppers were not soft enough the first time around. After roasting lightly, they were the perfect texture… just as we’d enjoyed at the restaurant. Be certain to serve with a nice crusty Italian bread. Trust me, you’ll want it to sop up the tasty sauce.
August 10, 2012 4 Comments