pumpkin craft 2
Here is the second pumpkin craft I found on Pinterest. This is the one that took several hours and a steady hand to create. It wasn’t that it was all that difficult, there was just a lot of drying and waiting time involved. I believe that the original pumpkin I saw on Pinterest was made with a real pumpkin, I used a faux pumpkin because I wanted to have it year after year instead of throwing it away in a few weeks after it rotted out.
Initially I purchased a $24.99 white pumpkin from Hobby Lobby – using a 40% off coupon – paying $14.00 for it. Before I could get to the project, I found an $8.00 white pumpkin at Target and decided to use that one instead.
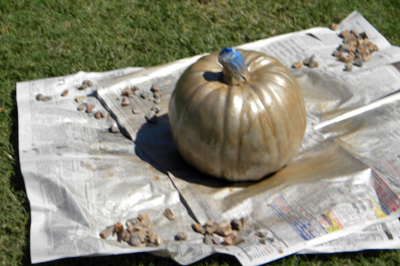
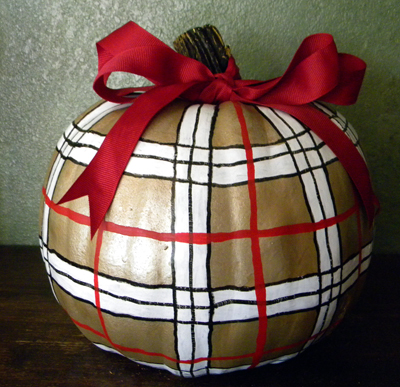
The creases that run from stem to bottom were much more defined on the $14.00 pumpkin and I may still use it to make another, I think it would turn out a bit prettier and be easier to figure out exactly where to draw the vertical lines. I also wasn’t thrilled with the tan spray paint I picked out. It turned out to be quite metallic, more gold than tan, and also dripped profusely, so I’ll be buying a different paint when I make that second one. We’ll call this one the trial run…Live and learn.
Pumpkin a la Burberry
Here is what you’ll need to make a Pumpkin a la Burberry:
1 faux pumpkin (from Target, Hobby Lobby, Micheal’s, etc.)
Painter’s tape
Tan paint
White, black, and red paint markers
Red ribbon
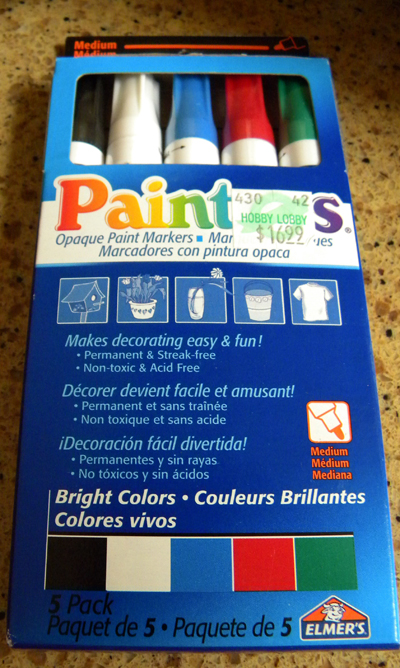
I purchased Elmer’s Paint Pens at Hobby Lobby with a 40% off coupon (I have the Hobby Lobby app on my iPhone), so I paid $9 for the set of 5 pens.
The medium tip worked well, even though I had to go over the red stripes to make them wider, the thick tip would have been too wide for the black stripes.
I suppose that if you were buying the pens all separately, you would buy the medium black and the thick white and red… but the 5-pack is a much better deal than purchasing the pens individually.
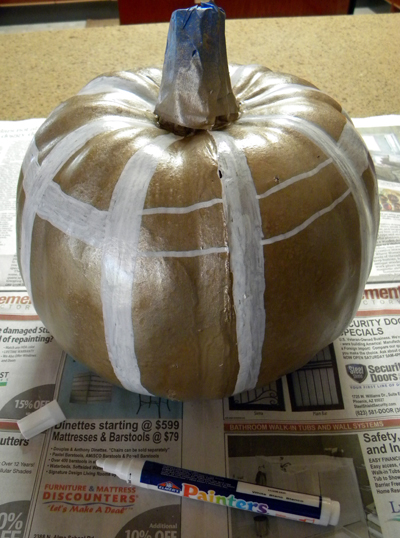
Cover the pumpkin stem with painter’s tape, paint the pumpkin, and take a very blurry picture, if desired. Allow to dry completely.
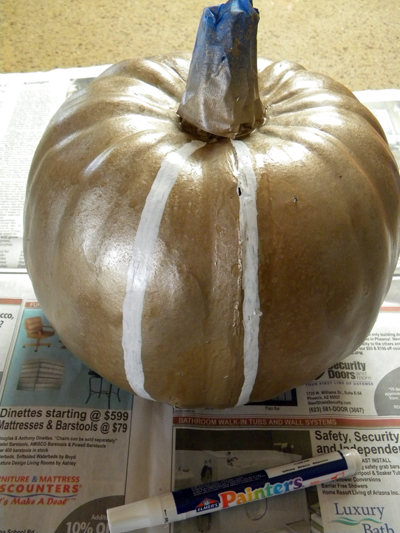
Using the white paint pen, draw thick vertical lines all the way around, the pumpkin. Allow to dry completely.
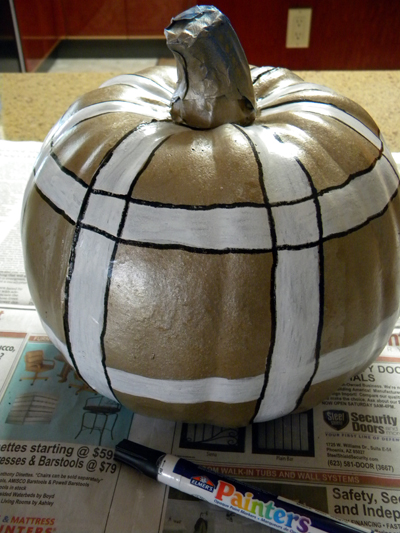
Next, use the white paint pen to draw 3 thick horizontal lines around the pumpkin and allow to dry completely.
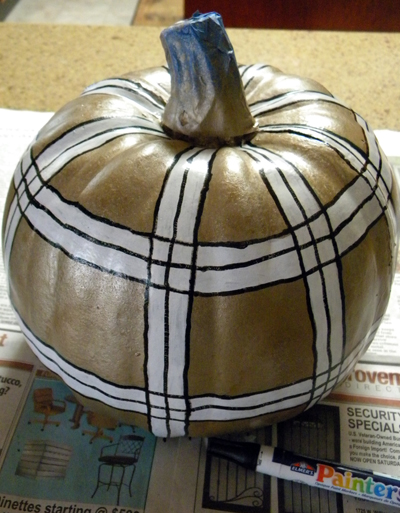
Use the black paint pen to outline all of the white lines down and around the pumpkin. Let dry.
Now use the black paint pen to draw lines down and around the center of the white lines. Let dry.
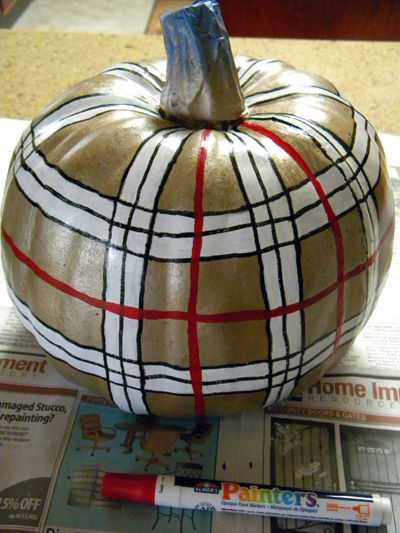
Use the red paint pen to draw red lines between the white lines down and around the pumpkin. Allow to dry completely.
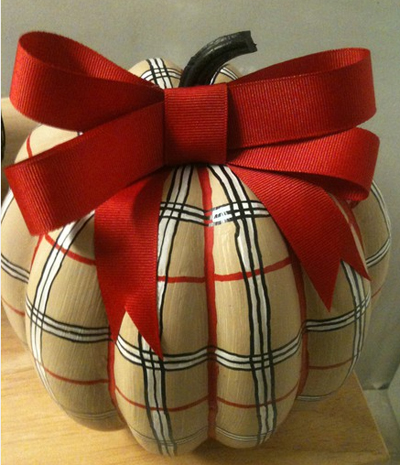
Carefully remove the painter’s tape and use the red ribbon to tie a bow around the stem. Congratulations, you now have your own Pumpkin a la Burberry! Hopefully, it is tan instead of gold, has more defined vertical creases – which will give you more vertical white stripes down the pumpkin, and will end up looking exactly like the pumpkin below – which is the one that I first spotted on Pinterest! And not as much as the one above, which in comparison, looks like a 6-year-old made it!
Yeah, I’ll be giving it another try! 🙂





3 comments
This one’s so cute!
I love it. I’m up for doing the 2nd time around project with you. Going to Hobby Lobby as a matter of fact!
Thanks Missy May. Ronnie, I’m in! While you’re there, get us some nice tan (not shiny gold) paint and we will do this! Amy, you need to join us too! xox
Leave a Comment